Background
Your identity provider may have SCIM connectors that automate user provisioning tasks. Provisioning webhooks cover cases where SCIM support isn’t available, is too expensive, or doesn’t do what you need, and cases where you need to provision to a homegrown app or database. You can use provisioning webhooks to automate provisioning for virtually any app, resource, or permission so that your app admins spend less time managing access and employees get what they need faster. This article describes some common scenarios where provisioning webhooks are useful and how to set them up.Common use cases
If you’re looking for inspiration, below are some sample scenarios where Lumos customers have used provisioning webhooks to eliminate manual work and reduce time to access.- License assignments Let’s say you can assign people to Zendesk in your IdP but that doesn’t assign them a license, and you want to fully-automate the workflow. You can create a provisioning webhook that grants the license requested after the request is approved.
- SCIM-less provisioning Not all apps support SCIM, or it might require a costly upgrade. However, there are many cases where you still want to create an account for someone via a user management API. You can call the service provider’s API via a provisioning webhook after someone’s access is approved to automate common tasks, such as creating or updating their account. See Approving Access Requests
- Internally-developed apps You might need to create or update an account for someone when they need more access to an internally-developed app or tool. Provisioning webhooks have also been deployed here to save hours of time managing and securing access to these tools, which usually contain sensitive data.
What’s sent in the webhook?
Lumos sends a JSON payload of access request data when the webhook is triggered. The format of this payload is below.How should my script or workflow respond?
Please follow the general guidance on how to format your webhook responses here: Creating Webhooks The allowed “response” values for provisioning webhooks can be found below. If the user was provisioned (Success)Where can I use provisioning webhooks?
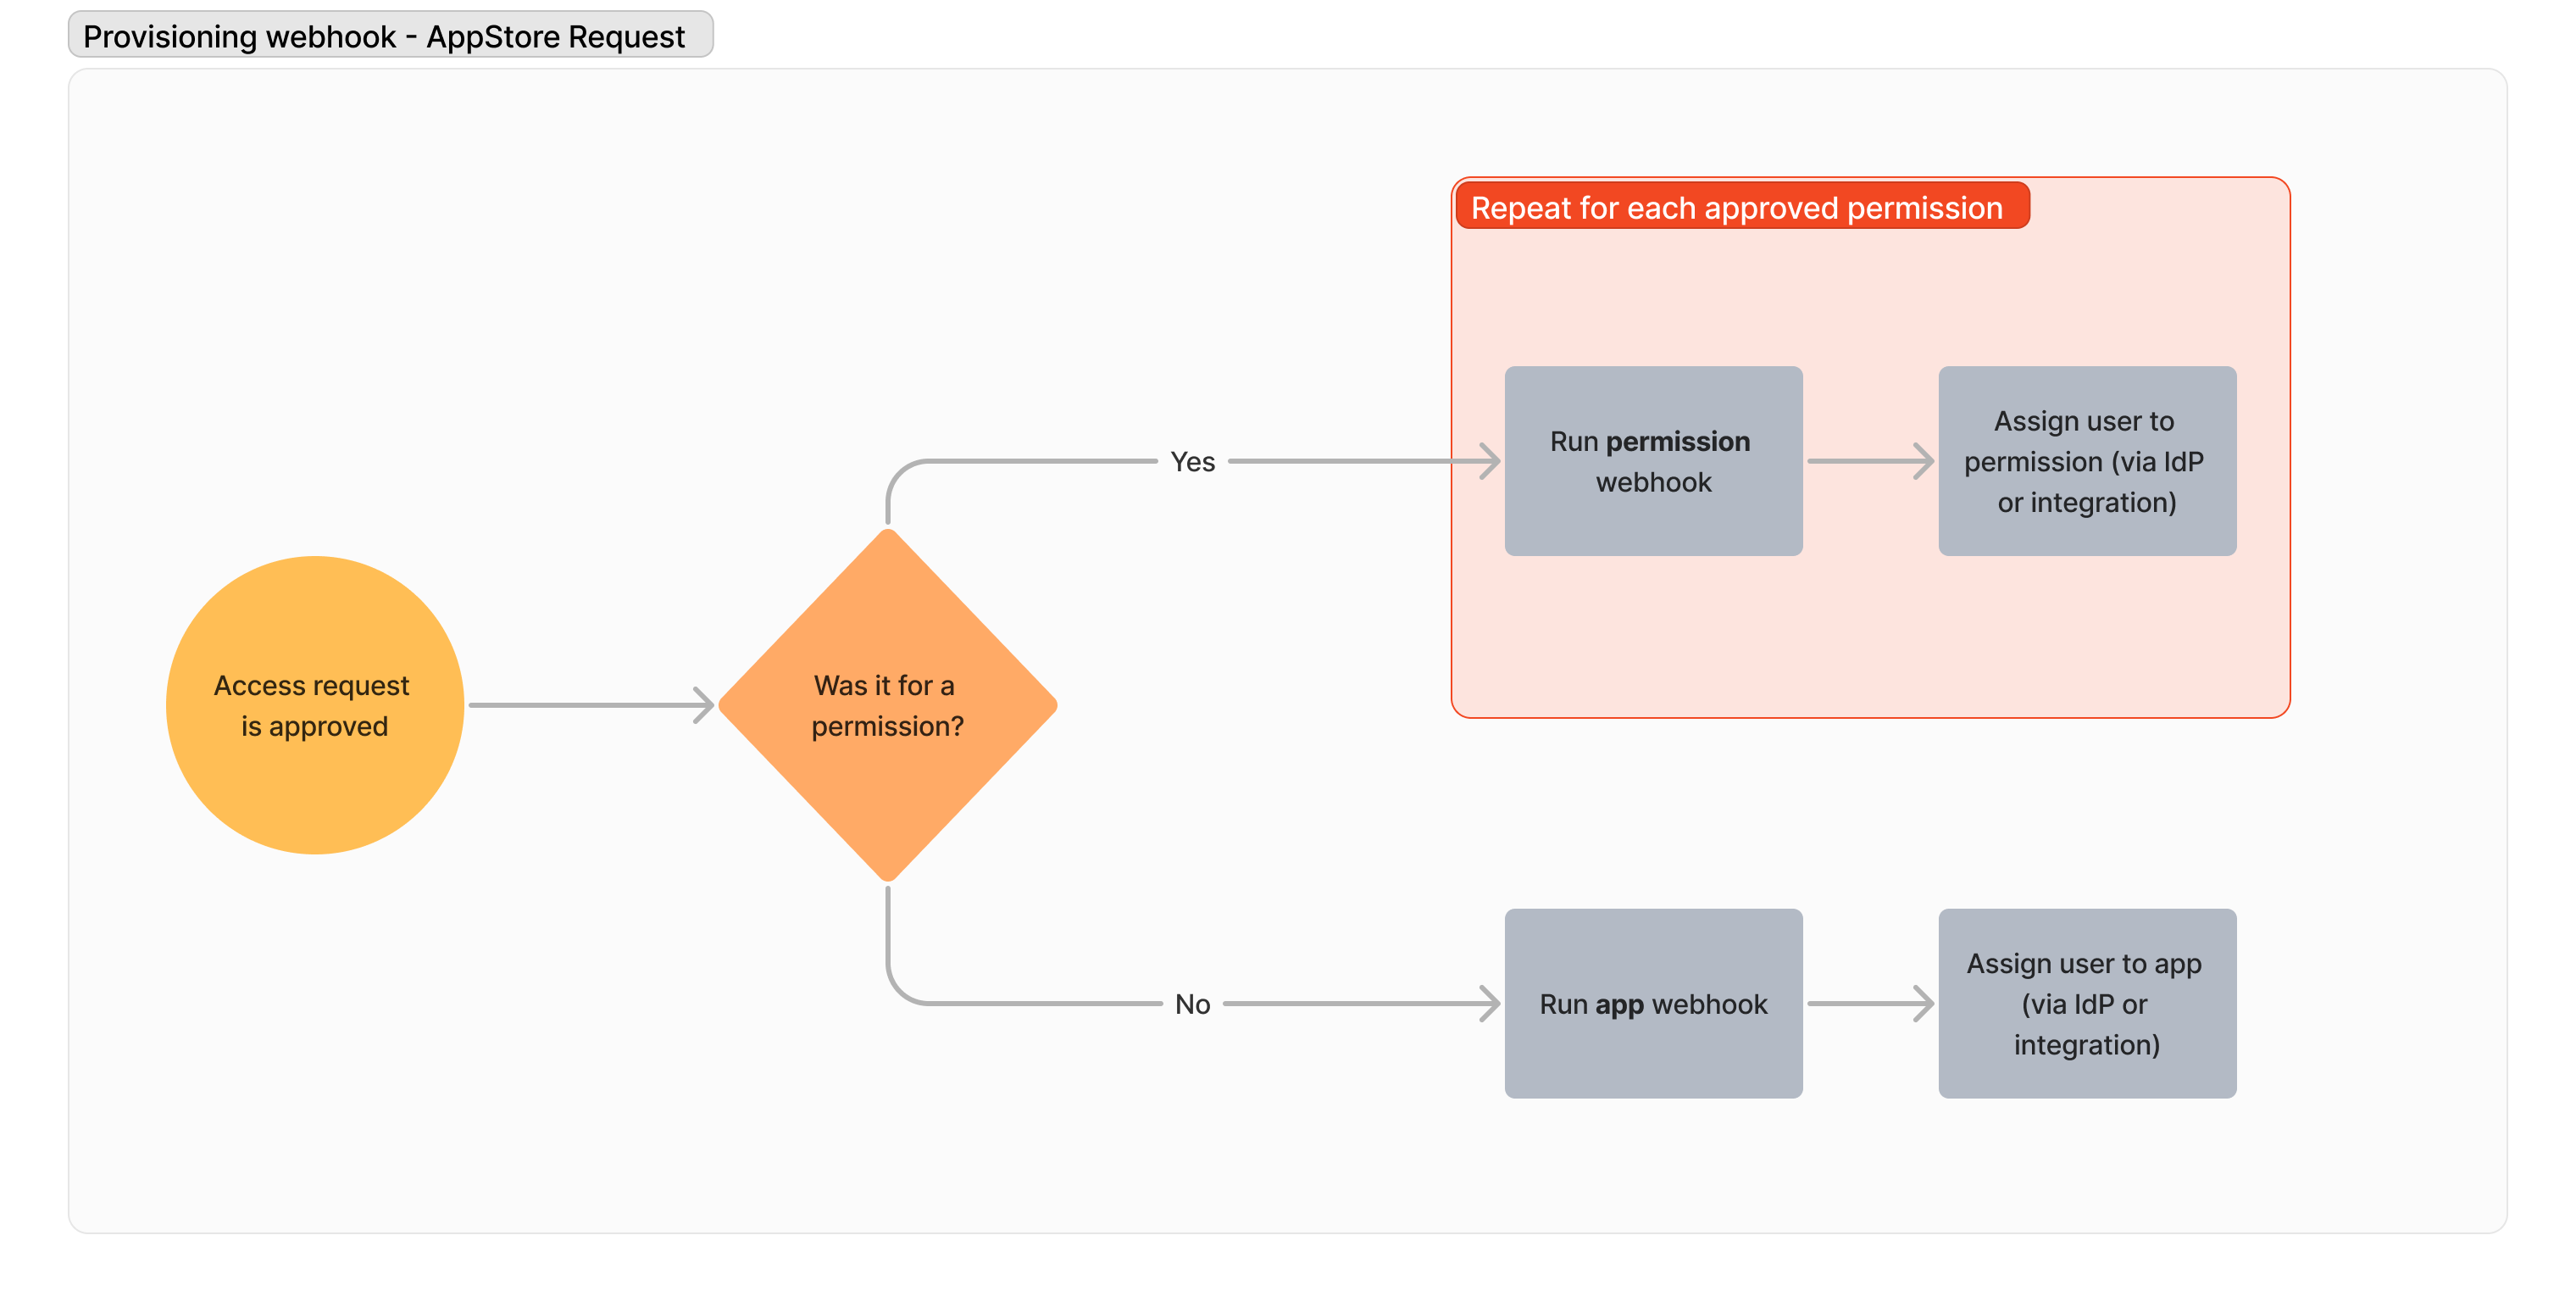
Provisioning webhooks are used in the AppStore. See What is the AppStore? After you create a provisioning webhook, you need to add it to an app or a permissionfor it to run. See Creating Webhooks The diagram below shows when to use an app webhook or a permission webhook. In short, if a user is being approved for a permission, use a permission webhook. For all other cases, use an app webhook.