Background
Using pre-approvals is a fantastic way to level up your AppStore. It brings time to access to essentially zero and unblocks people from getting access in “break glass” scenarios. See Setting Up Pre-Approvals You can use IdP/email groups to determine who is pre-approved, but that may not always be enough. In these cases, you can use pre-approval webhooks in addition to your other pre-approval conditions to verify whether someone should be pre-approved for an app. This article describes some common scenarios where pre-approval webhooks are deployed and how to set them up.Common use cases
If you’re looking for inspiration, below are some sample scenarios where Lumos customers have used pre-approval webhooks to improve security posture and least-privilege.- Role Verification Sometimes, whether a role should be pre-approved for access to an app is not as clear as checking their title or the groups they belong to. In these cases, a pre-approval webhook can be used to check your IdP or HRIS to verify that someone can be pre-approved for access.
- On-Call Rotations If you’re not using PagerDuty or Opsgenie to manage on-call rotations, where Lumos already has native integrations to pull in on-call schedules, you can create a pre-approval webhook to check whether an engineer is on-call, entitling them with pre-approved, time-based access to sensitive apps in “break glass” scenarios (ex. AWS RDS write access).
What’s sent in the webhook?
Lumos sends a JSON payload of access request data when the webhook is triggered. The format of this payload is below.How should my script or workflow respond?
Please follow the general guidance on how to format your webhook responses here: Creating Webhooks The allowed “response” values for pre-approval webhooks can be found below. If the user should be pre-approved for the app (Success)Where can I use pre-approval webhooks?
Pre-approval webhooks are used in the AppStore. See What is the AppStore? The diagram below shows how pre-approval webhooks work for permission webhooks.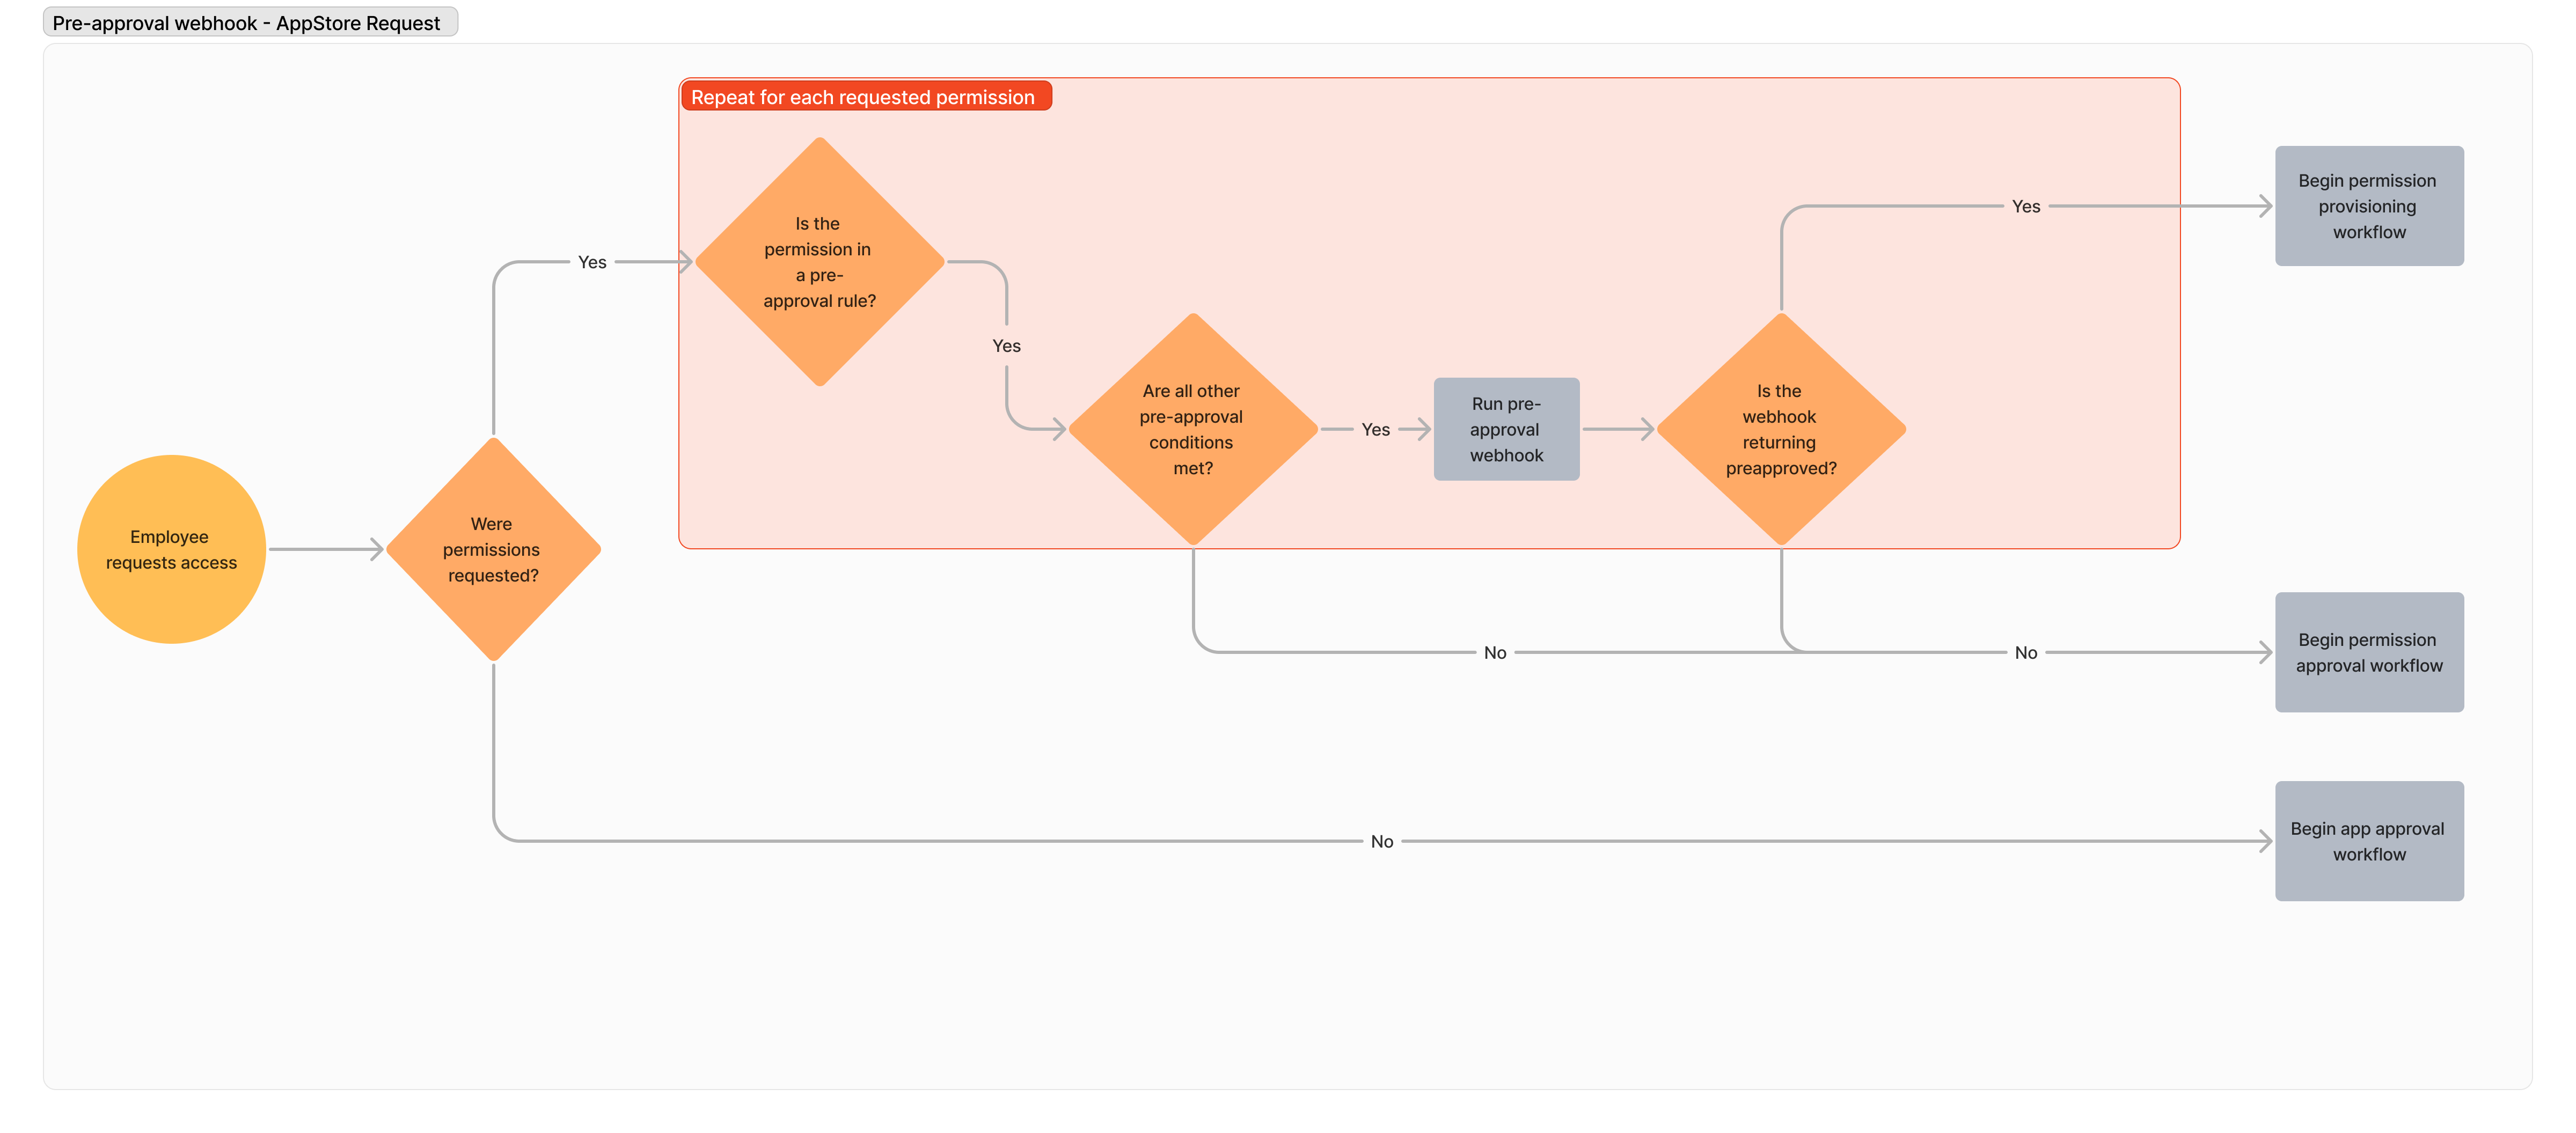
Configuring an AppStore pre-approval webhook
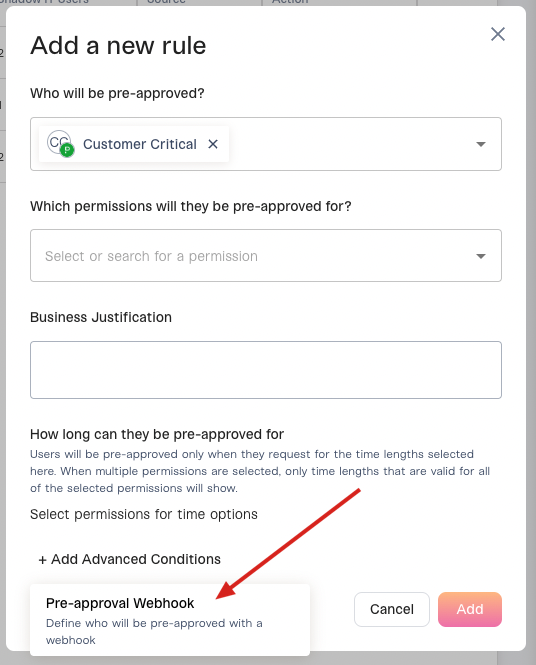
If you want to run a webhook as part of a pre-approval rule, follow these steps.1. Go to your AppStore apps and find the app in question.
2. Click “Settings”.
3. Click “Pre-approval rules”, then create a new rule.
More guidance on pre-approval rules can be found here: Setting Up Pre-Approvals4. In the Add Advanced Conditions section, select your Pre-approval webhook.