

CNAME records at your DNS provider. This article walks through copying those records from Lumos and publishing them.
Prerequisites
- Admin role in Lumos.
- Access to your DNS provider (or the ability to ask your system administrator to add records for you).
Instructions
In Lumos
-
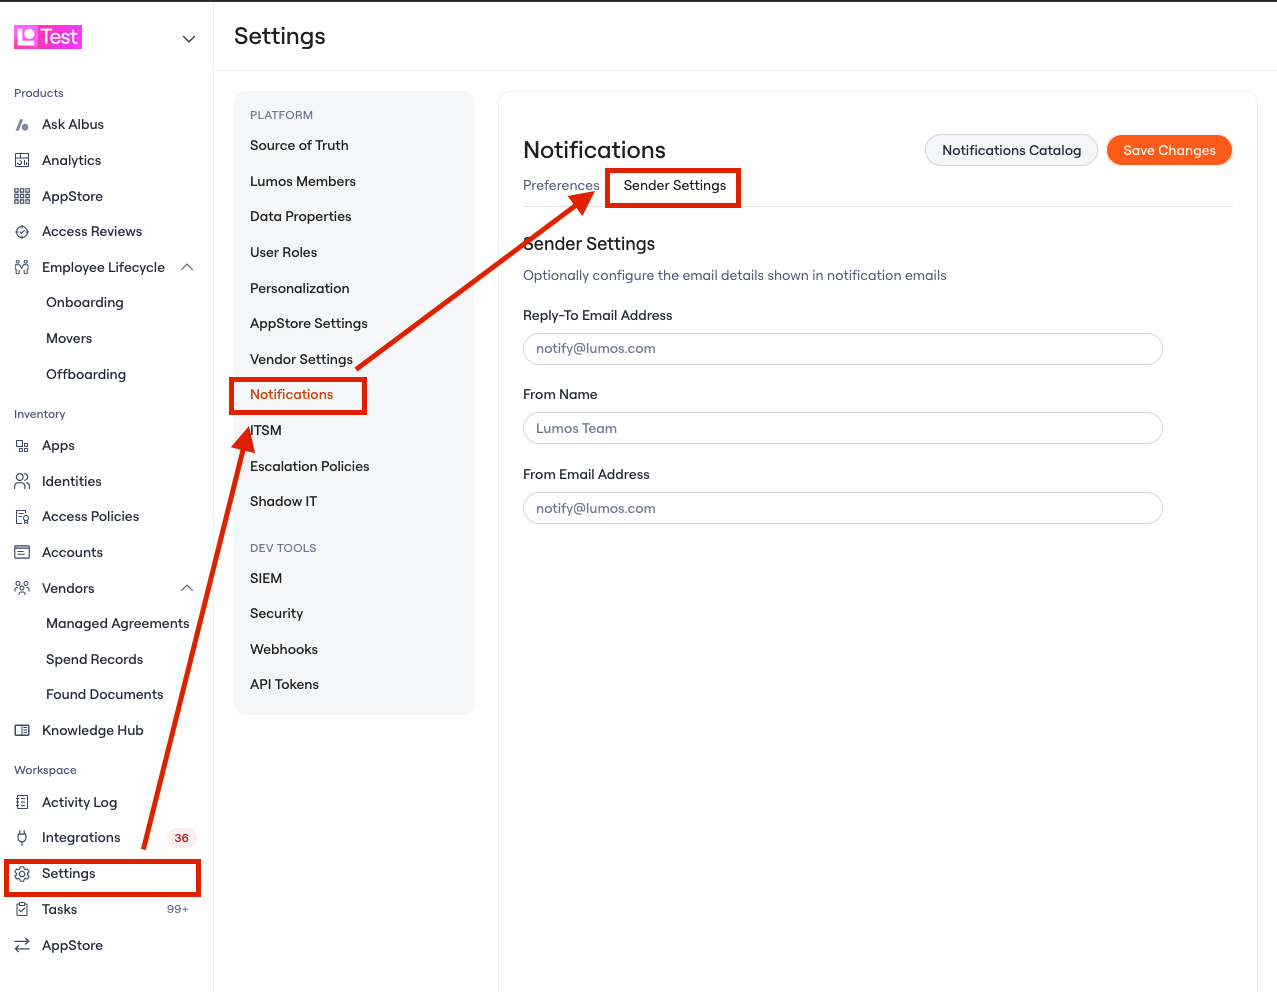
Go to Settings → Notifications → Sender Settings to open the “Authenticate Domain” page.
-
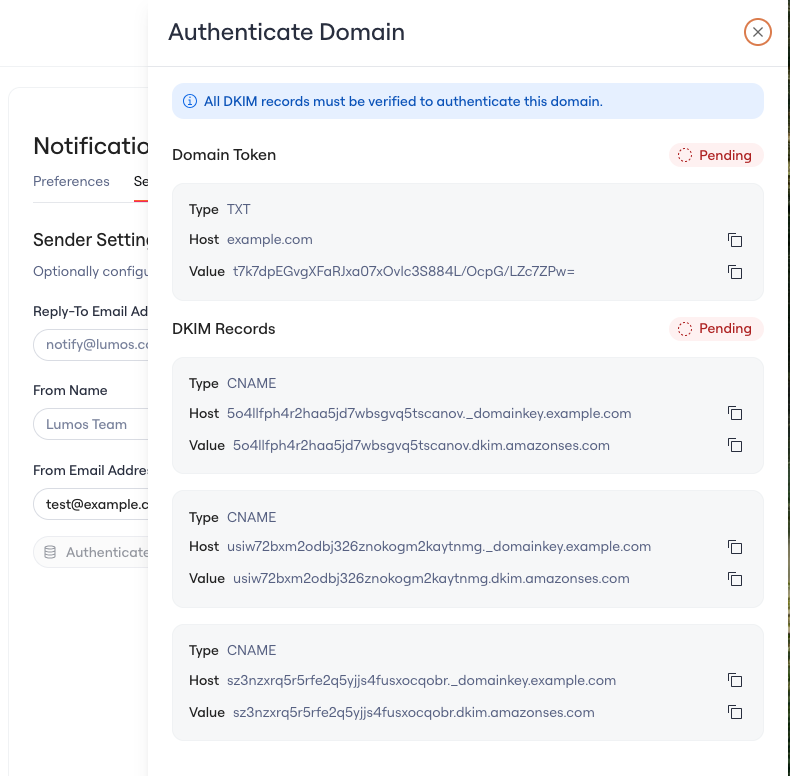
Copy the three
CNAMErecords shown on the page.
In your DNS provider
- Log in to your DNS provider. If you’re not sure who hosts your DNS, ask your system administrator.
- Add each
CNAMErecord to your domain’s DNS settings. Use the exact record names provided by Lumos. - Save your DNS changes.
Back in Lumos
-
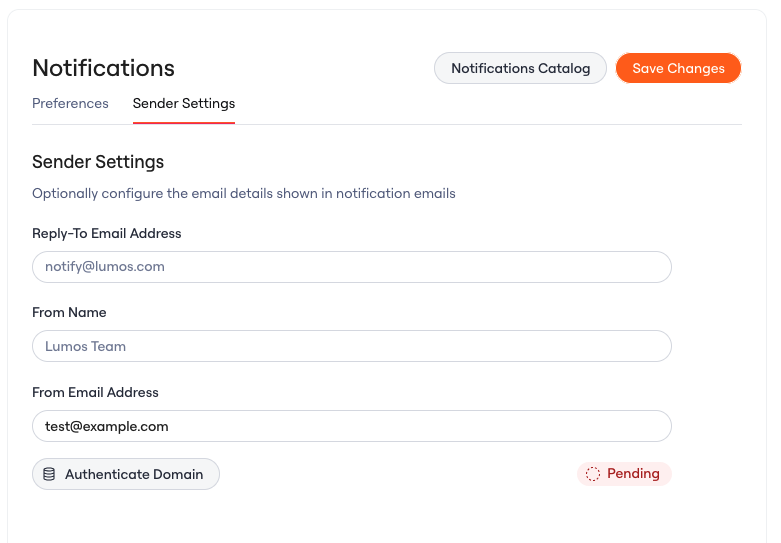
Return to the “Authenticate Domain” page.
-
Wait for the status badge to change to
Verified. DNS changes can take up to 72 hours to propagate.
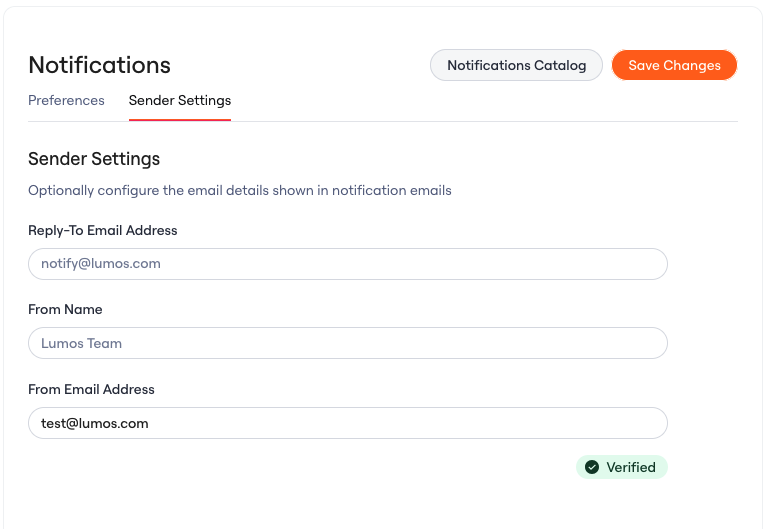
- Once the badge shows
Verified, Lumos starts sending email from your customized address.
Correct CNAME format
The_domainkey portion is part of the record name and should be used exactly as Lumos provides it. Do not add a leading underscore.
- Correct:
abc123._domainkey.domain.com - Incorrect:
_abc123._domainkey.domain.com
FAQ
How do I check verification status? Return to the “Authenticate Domain” page. If the badge showsVerified, you’re set. Most DNS providers update within a few hours.
What if the badge never updates to Verified?
- Confirm each record name matches exactly what Lumos provided (no extra underscores, no truncated
_domainkeyportion). - Confirm the records were saved at your DNS provider.
- If it has been more than 72 hours and the records are correct, contact support@lumos.com.