

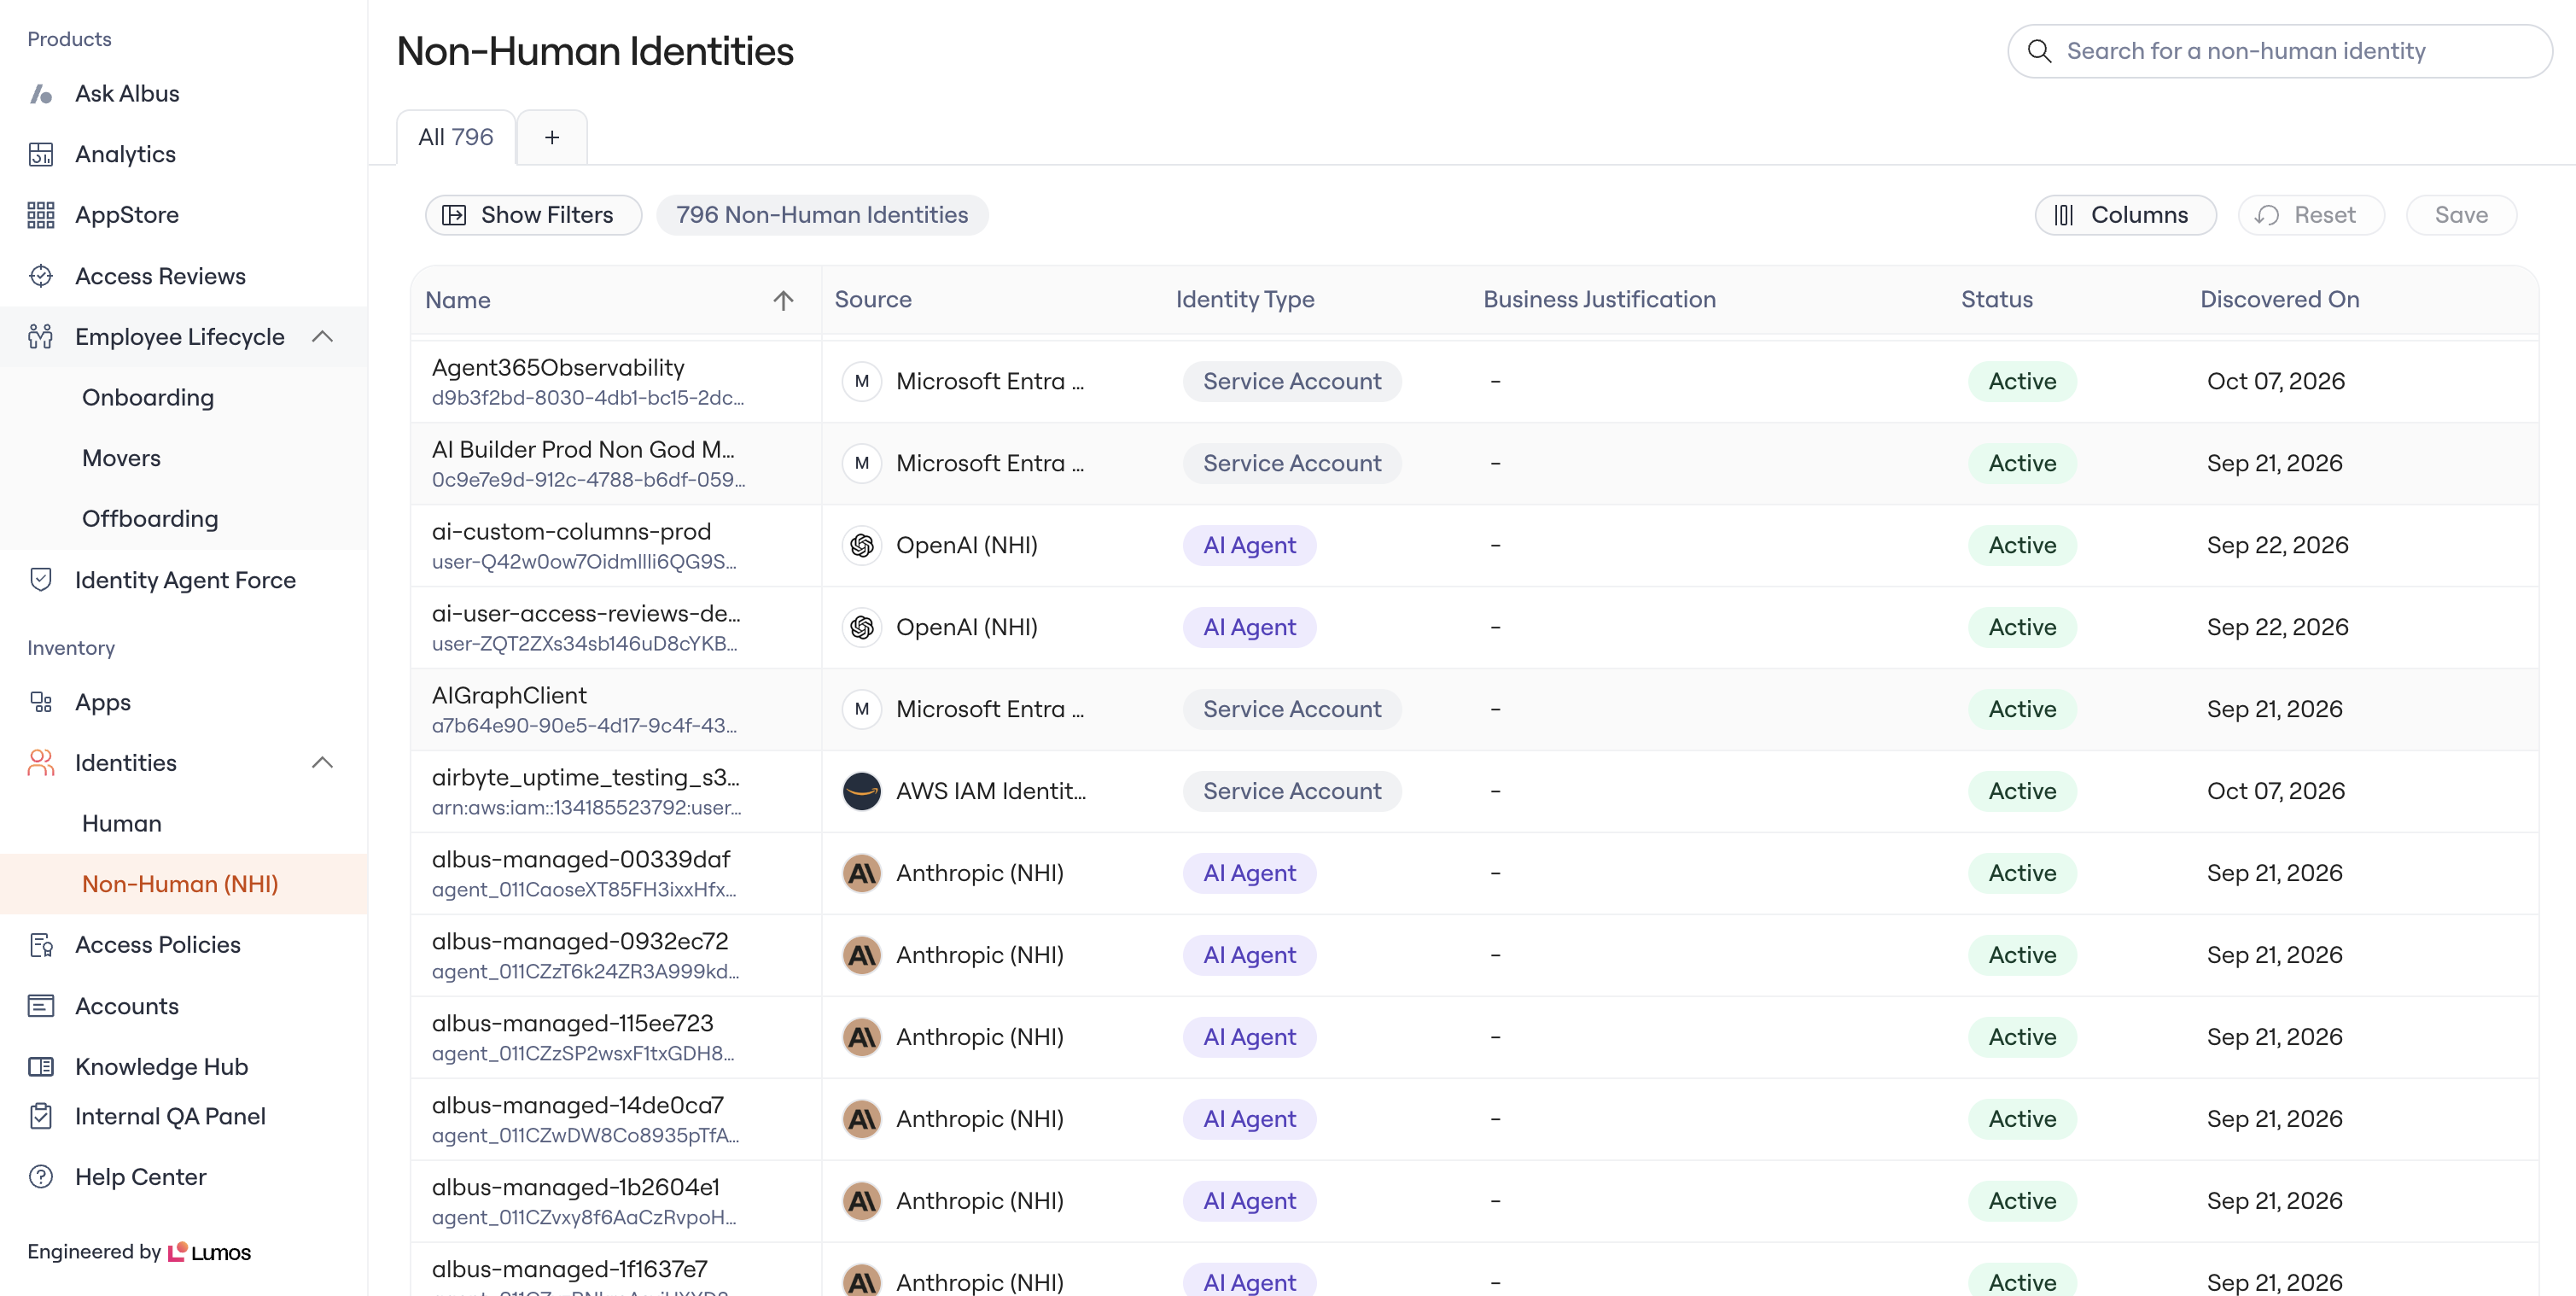
Identities → Non-Human (NHI) in the left nav opens the table, with Source, Identity Type, Status, and Discovered On.
What the table shows
- Name. The identity’s display name. Hover for the identifier the source uses.
- Source. The connector the identity came from, such as Microsoft Entra ID (NHI) or AWS (NHI).
- Identity Type. One of four types, described below. Lumos classifies each identity from what the source reports and how it is configured.
- Owners. The person accountable for the identity. The column is hidden until you turn it on from the column controls.
- Business Justification. A short note on why the identity exists, written by your team.
- Status. Active or Inactive, as reported by the source.
- Discovered On. The date Lumos first saw the identity.
The four identity types
- AI Agent. An identity that acts through an AI model, such as a coding agent that pushes to GitHub or a workload that holds an Anthropic or OpenAI key.
- Service Identity. A workload or integration you operate and hold a credential for, such as an Entra app registration with a client secret.
- Application Identity. A workload that reaches your environment through federation rather than a static key, such as a CI pipeline that assumes an AWS role with a short-lived token.
- Service Account. A non-human identity Lumos cannot yet classify more precisely, including shared logins a person operates.
Open an identity
Click a row to open the identity’s page. The page has two tabs and a details panel.- Accounts. Every account the identity holds, one per connected application, with its type, how many permissions it carries, and when it was last active.
- Permissions. Every permission across those accounts, with the permission’s type, the account that holds it, the resource it reaches, and the resource type. Filter to one account or one resource type to narrow the list.
- Details. Identity type, owner, source, status, discovered date, and business justification, visible from either tab. Owner and business justification are editable here.
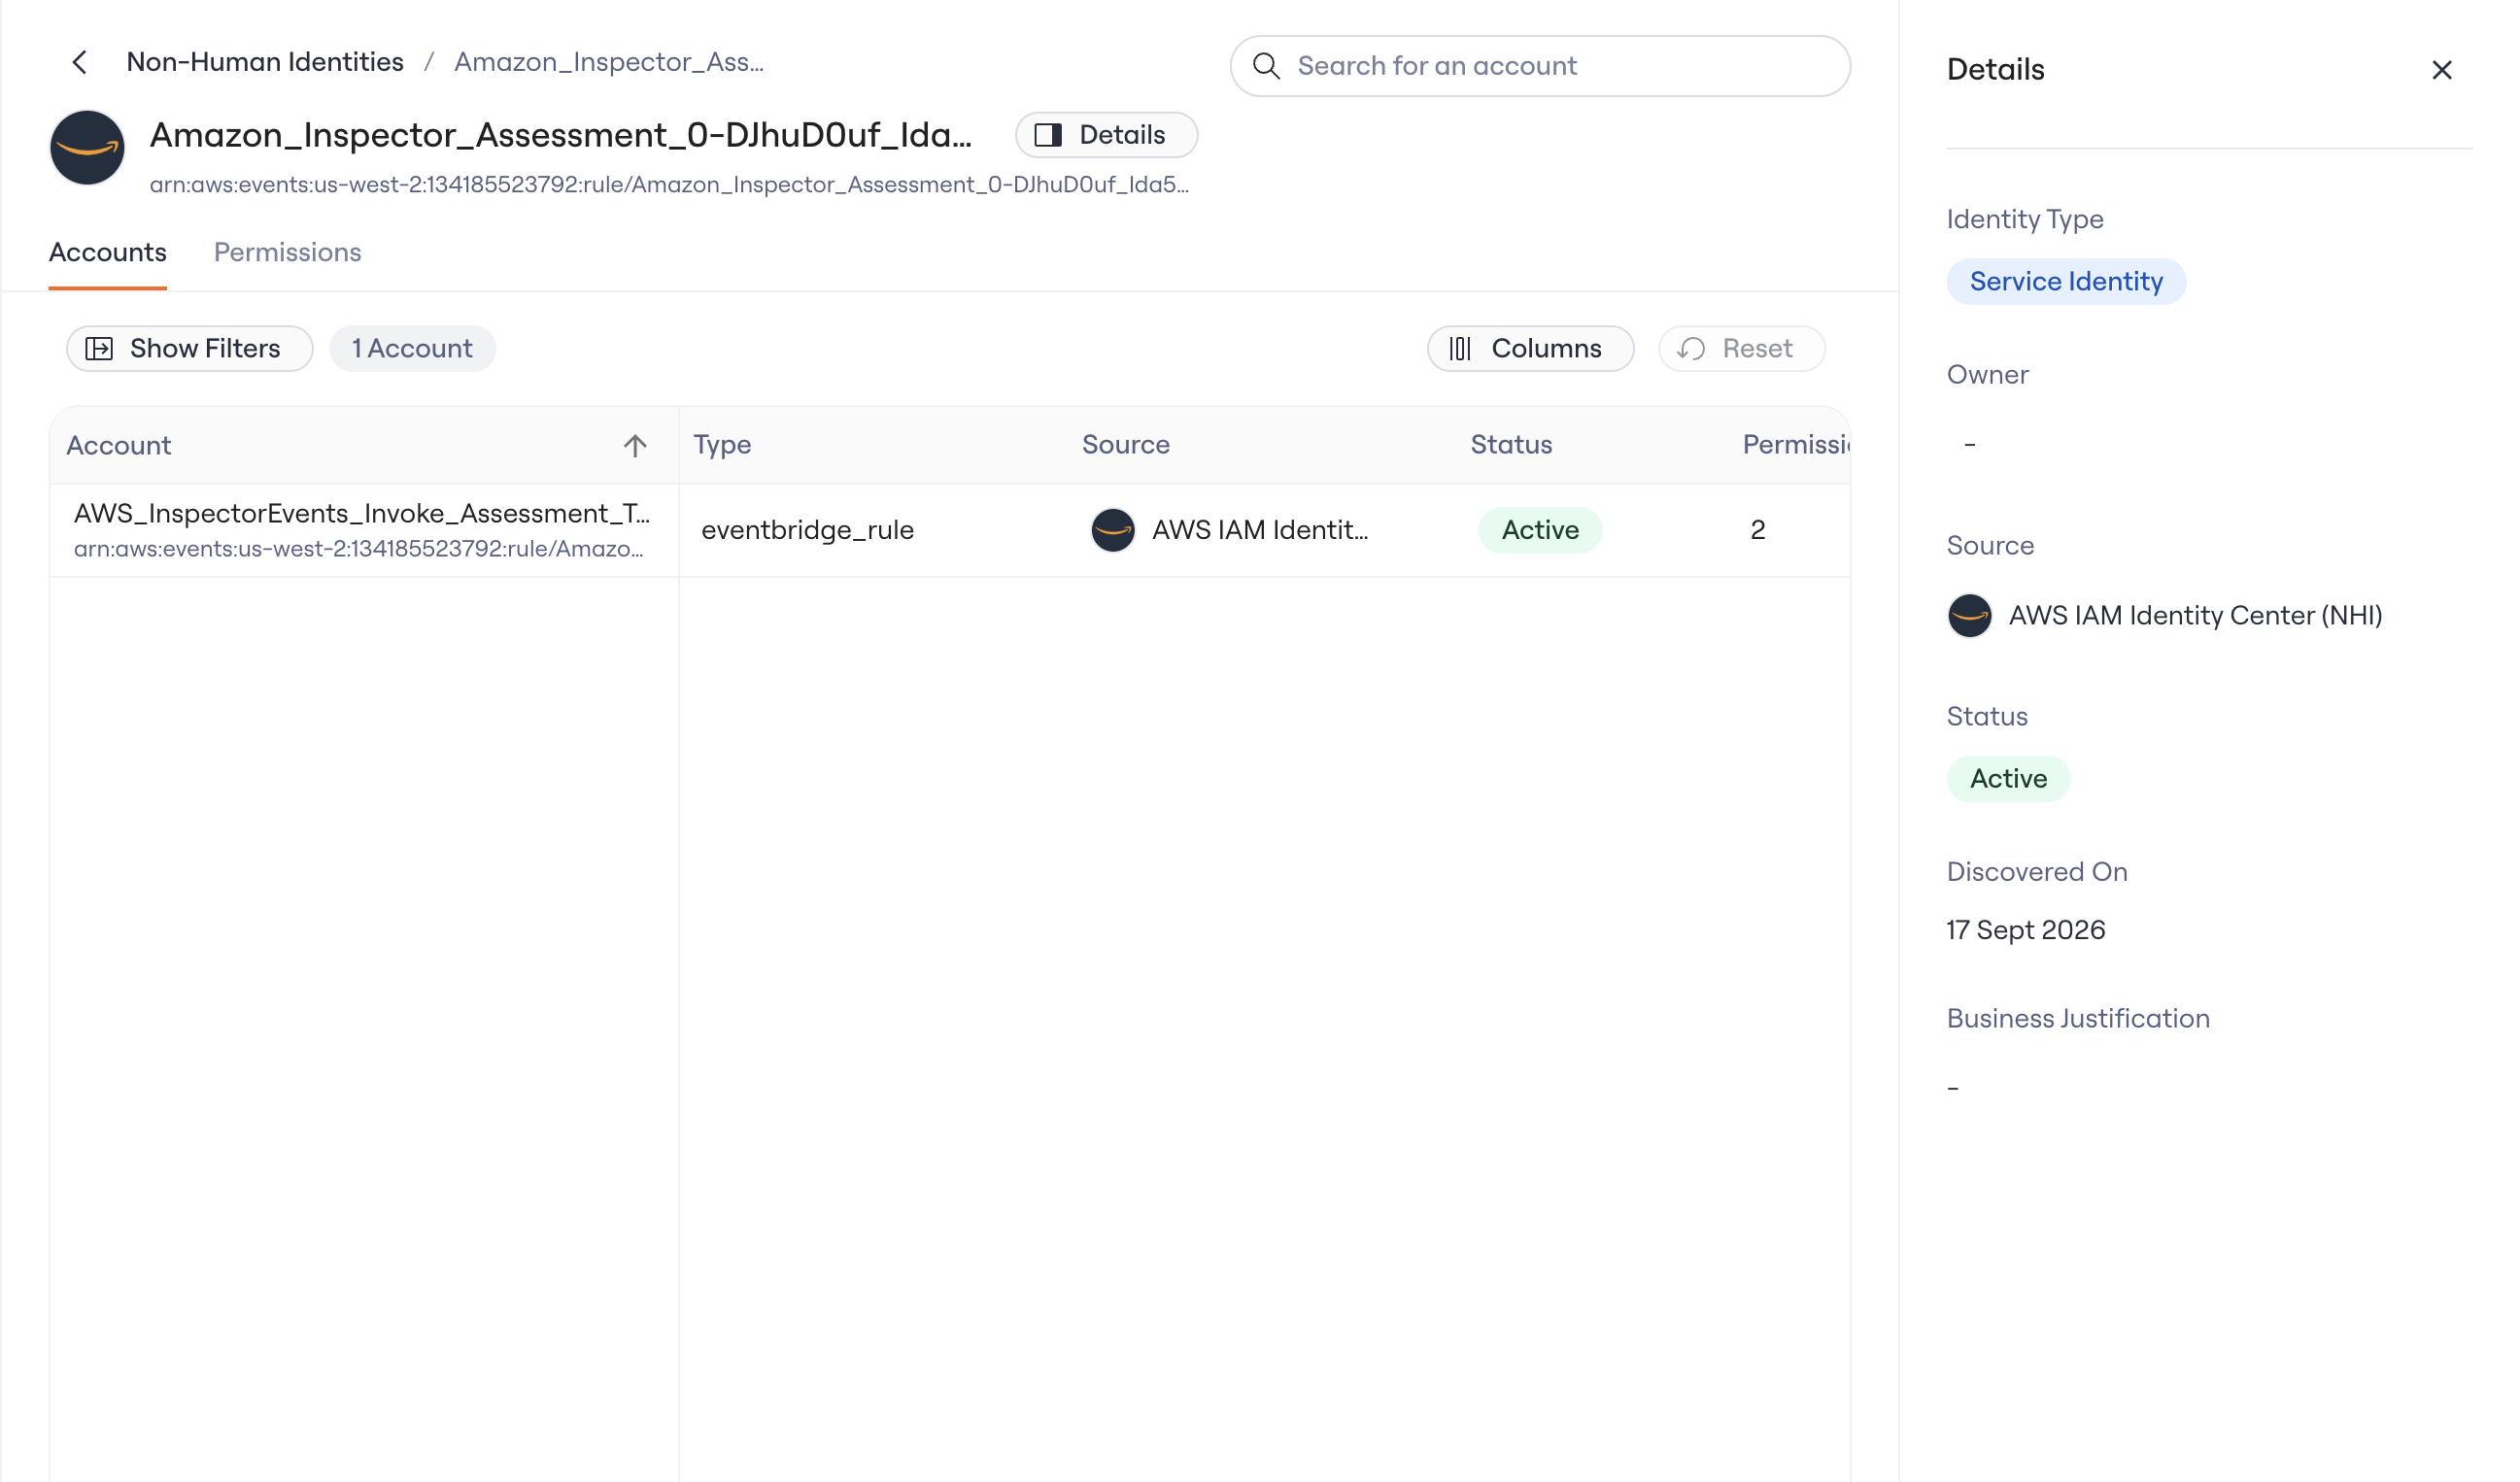
An identity's Accounts tab, with the Details panel open on the right.
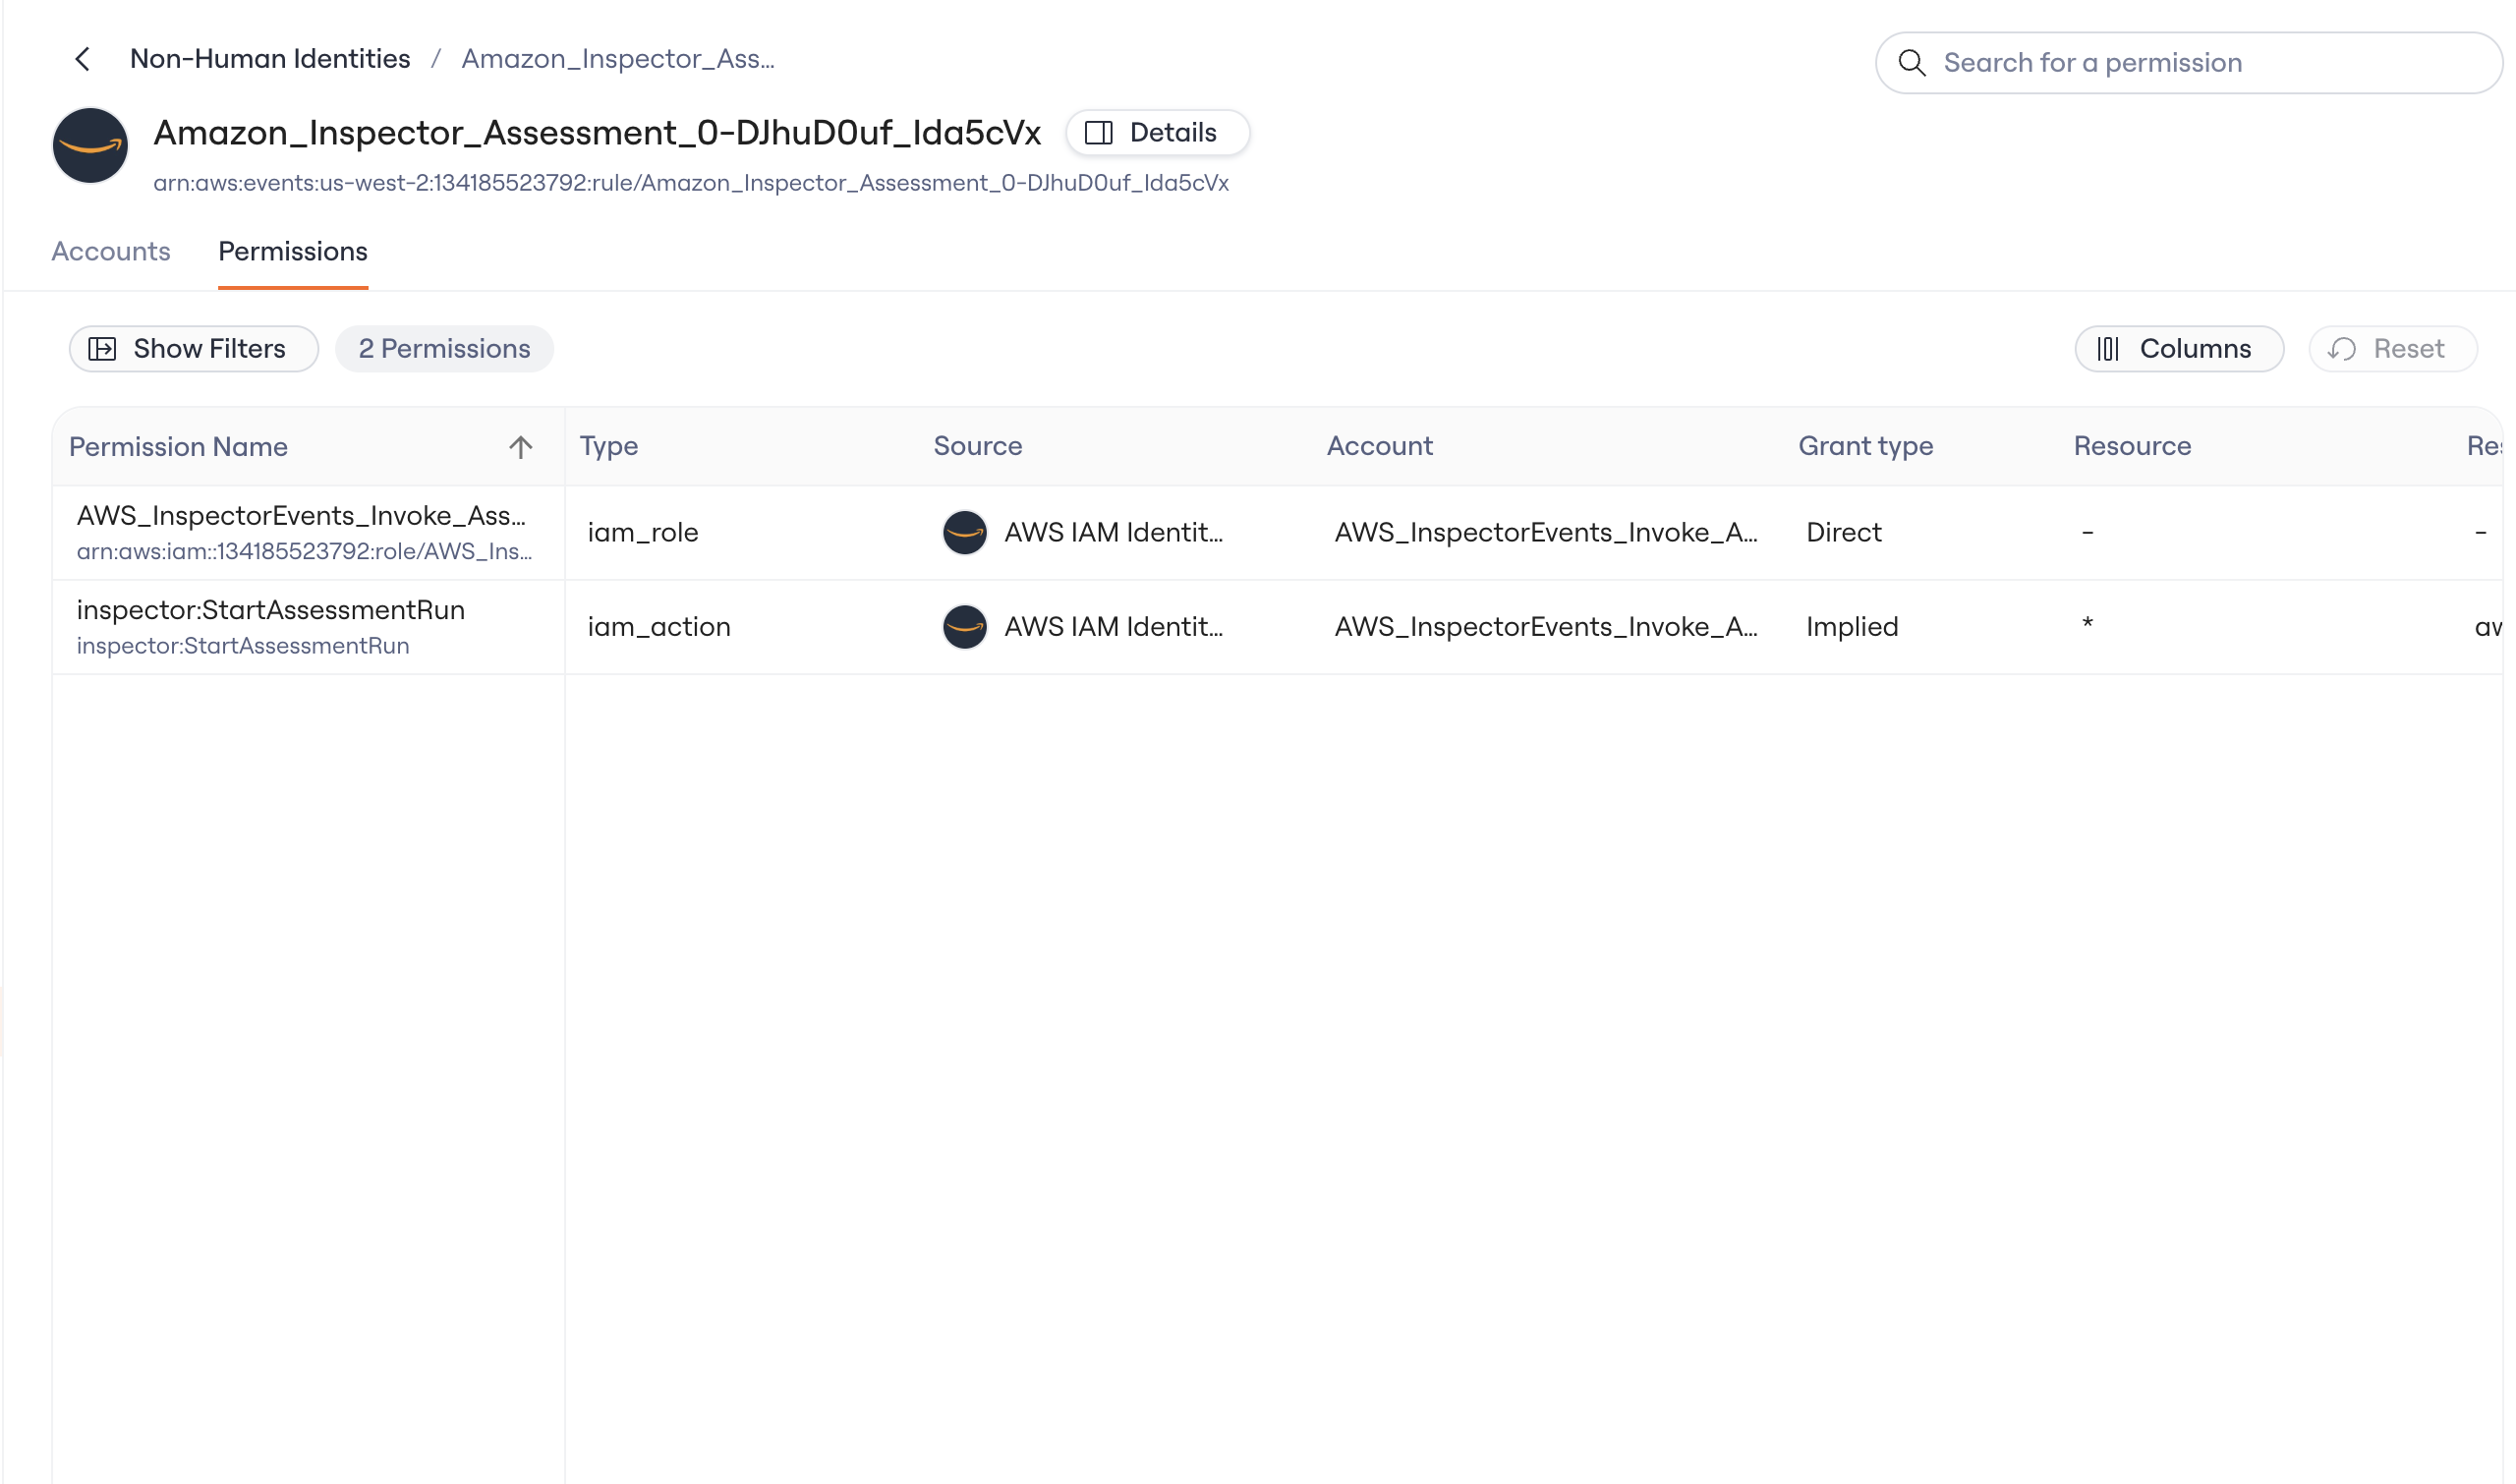
The Permissions tab: each permission with its type, account, grant type, and resource.
Work the inventory
- Search and filter. Search by name. Filter by identity type, source, owner, or status from the filter sidebar.
- Arrange columns. Show, hide, reorder, and resize columns. Save a filter and column layout as a view and switch between views.
- Assign an owner. Set the owner inline on the row or from the details panel. The owner follows the identity into security findings, so a finding arrives with a name on it.
- Record a business justification. Write why the identity exists so the next person who looks at it, or the next review, does not have to guess.
Where the identities come from
Each NHI connector installs the source’s non-human identities, their accounts, and their permissions into the inventory. The connector is separate from the standard integration you may already run for the same system, with its own read-only permissions. Lumos never reads secret values and never writes to the connected system. See Non-Human Identity Integrations with Lumos for the current connectors and the setup guide for each.Get started
1
Ask your Lumos account team to turn on the NHI Inventory
Lumos enables it per domain.
2
Connect an NHI connector
Follow the setup guide for the source. The first sync fills the inventory.
3
Assign owners and justifications
Start with the identities that hold the most permissions. Show the Owners column, set an owner on each, and record why it exists.
Frequently asked questions
How is this different from the Non-human tab on the Identities page?
How is this different from the Non-human tab on the Identities page?
The Non-human tab on the Identities page labels accounts from your standard integrations as service accounts so you can include them in access reviews and workflows. The NHI Inventory is built from the NHI connectors and models each identity in full: its type, owner, justification, every account it holds, and every permission and resource behind those accounts.
Can I use the Entra ID, AWS, or GitHub integration I already have?
Can I use the Entra ID, AWS, or GitHub integration I already have?
No. The inventory reads through a separate read-only NHI connector with its own permissions. It sits alongside the integration you already have.
Why do some identities show as Service Account?
Why do some identities show as Service Account?
Service Account is the type Lumos assigns when the source does not give enough signal to classify the identity as an AI agent, service identity, or application identity. Classification improves as connectors read more of the source, and reconnecting a connector picks up the latest rules.
Does the inventory include the security findings?
Does the inventory include the security findings?
Findings live on the Identity Agent Force page. The inventory is what the security agents read from, and the owner you set here is who a finding is routed to. See NHI Security for what the agents look for.