After this article
You’ll know how to set up automated onboarding workflows that run whenever a new employee is detected in your organization and grant initial access to critical systems.Background
When a new employee joins your organization, there’s a specific sequence in which their accounts should be created. Identity Provider (IdP) and Email Provider accounts need to be set up first, as they’re the foundation for accessing other tools. Onboarding Workflows in Lumos allow you to create a structured, automated process that ensures accounts are created in the right order, with proper timing between steps.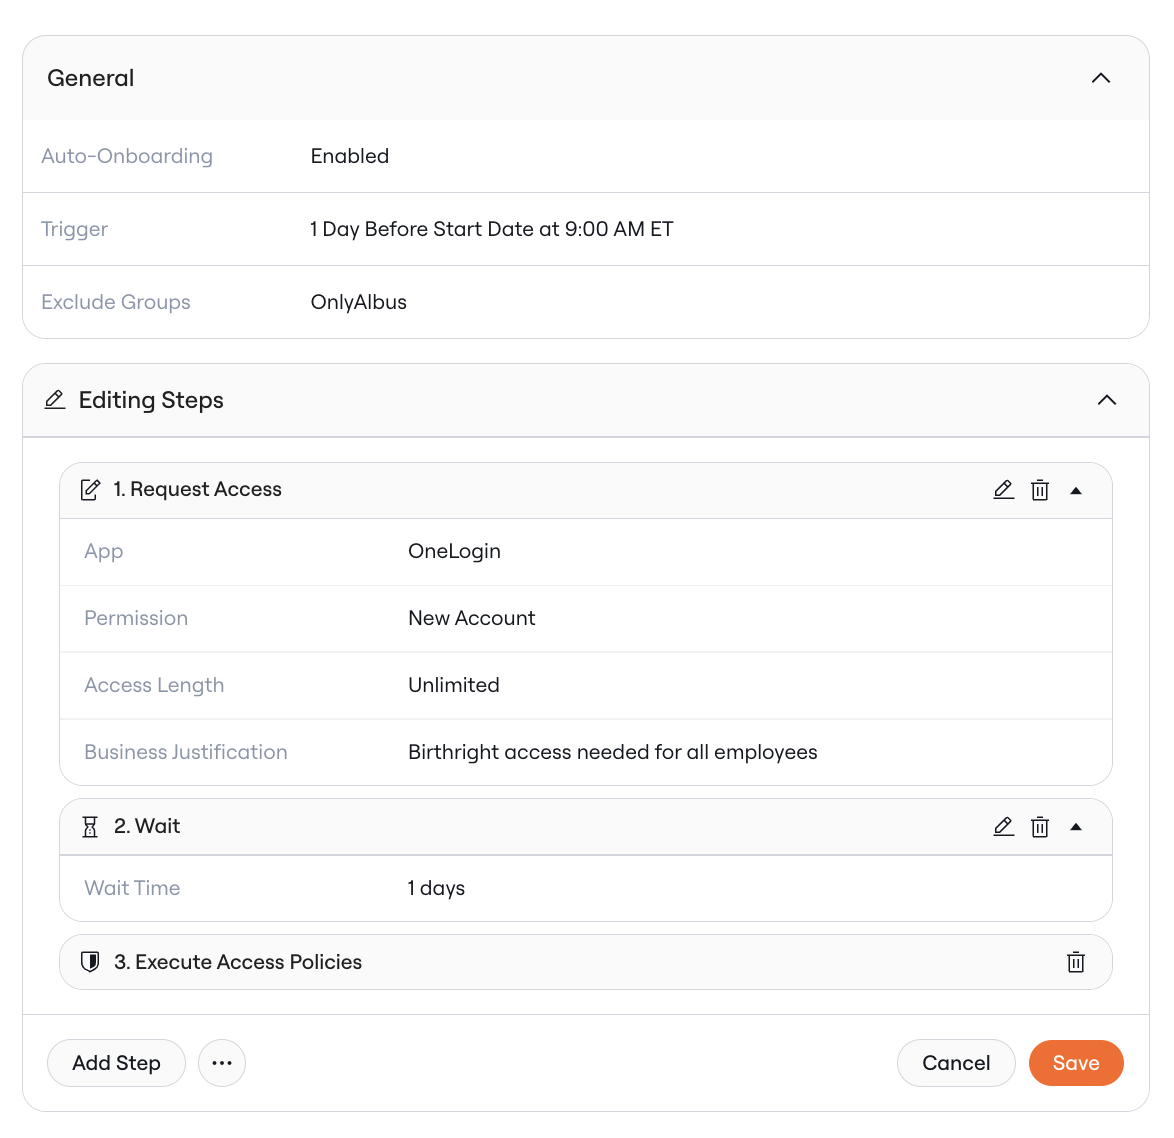
Configuring onboarding triggers
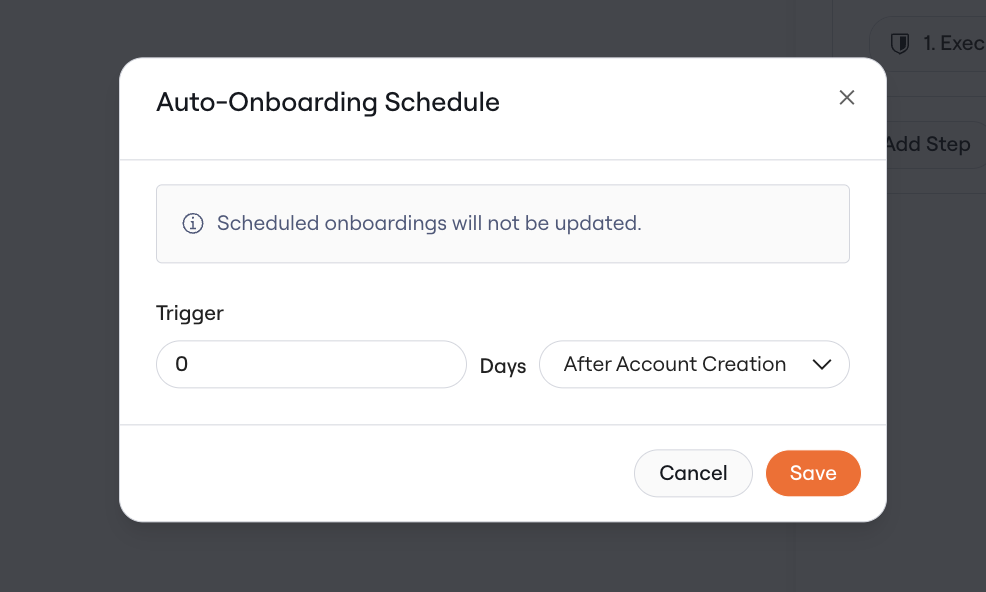
The first step in any onboarding is determining when the onboarding should start. Lumos supports 2 methods of automating new hire onboarding: As a best practice, automate onboarding workflows based on a start date. This allows you to sync start dates multiple days in advance of the onboarding so that access is ready on the employee’s first day.- Immediately Upon Account Creation. When you select this method, onboarding workflows will run automatically for all new hires as soon as a new identity is detected from one of your Source of Truth systems.
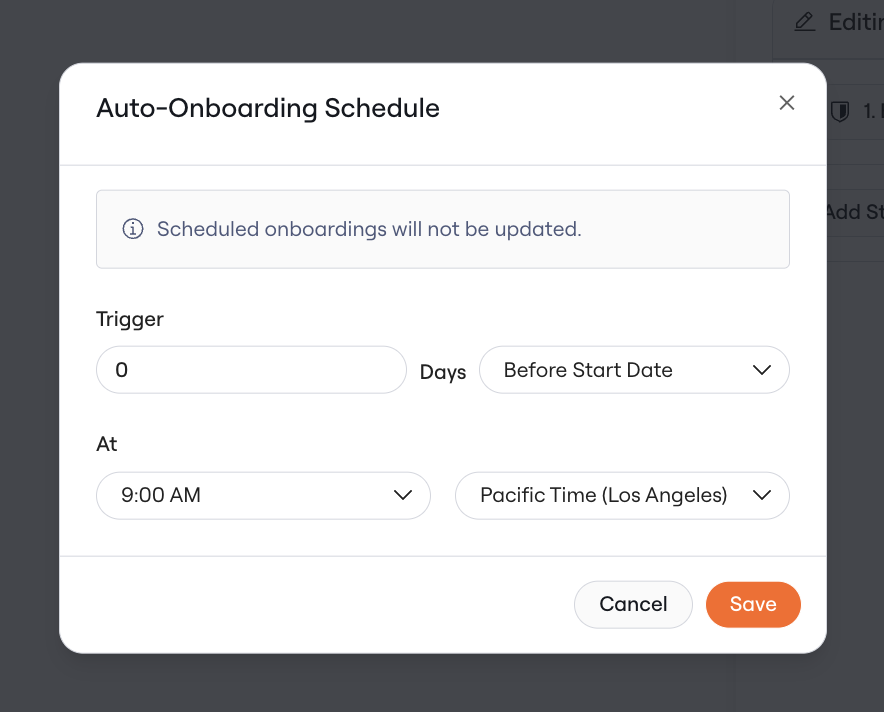
- Based on Start Date. When you select this method, onboarding workflows will run automatically a certain number of days before the “start date” for the employee, detected through your source of truth system
7-Day Lookback Window
When you enable an automatic Onboarding workflow, Lumos uses a 7-day lookback window to determine which users are eligible. This means the system evaluates users whose triggering event occurred within the past 7 days. Onboarding triggers and how the lookback applies:- X days After Account Creation — Lumos looks at the user creation date in Lumos. Any user created within the past 7 days of the specified date who is active and has no prior onboarding record will be matched.
- X days Before Start Date — Lumos looks at the user Start Date. Any user whose Start Date falls within the past 7 days of the specified date will be matched.
Configuring onboarding workflows
After configuring when an onboarding is triggered, you can also choose to run specific actions during an onboarding workflow. Lumos supports 4 actions in onboarding workflows today, described below.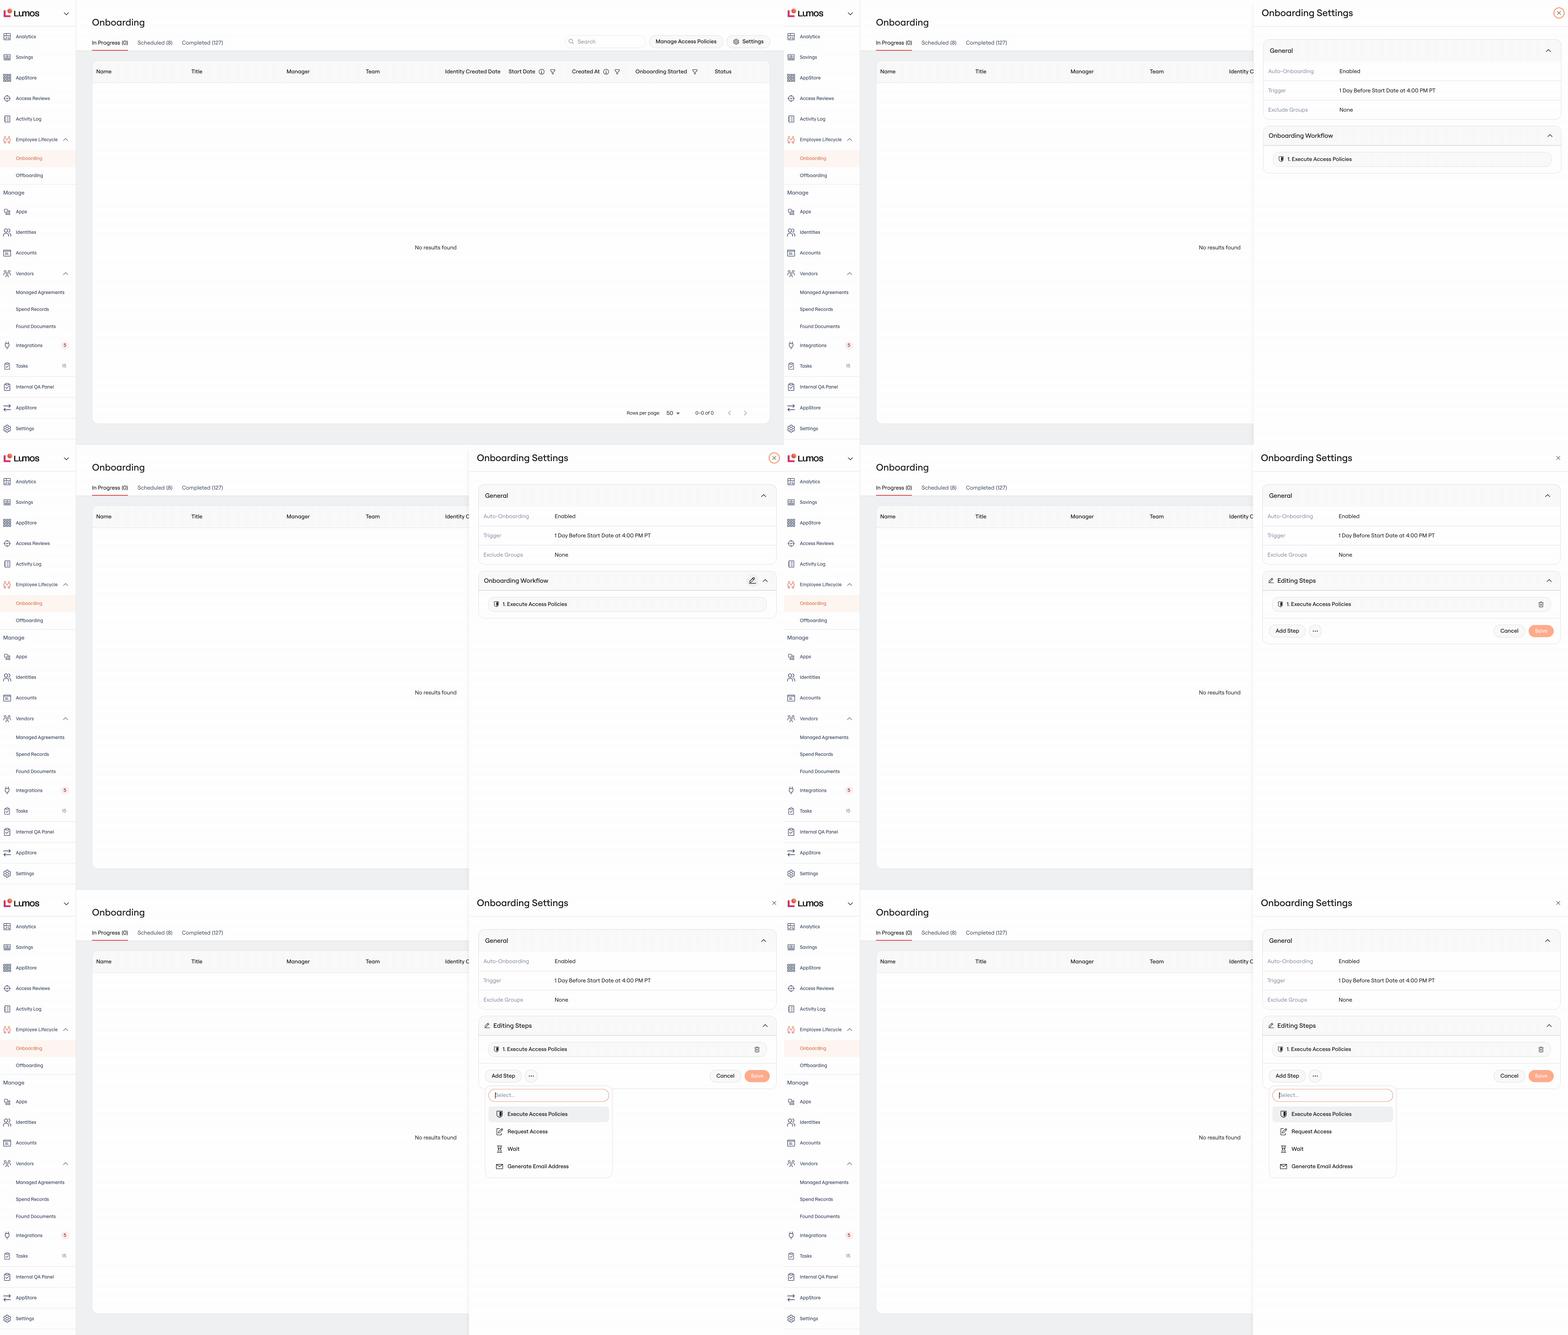
Create Access Request Step
This step kicks off an access request for application or permission. Use this step for Identity Provider or Email Provider accounts, which need to be created before all other access.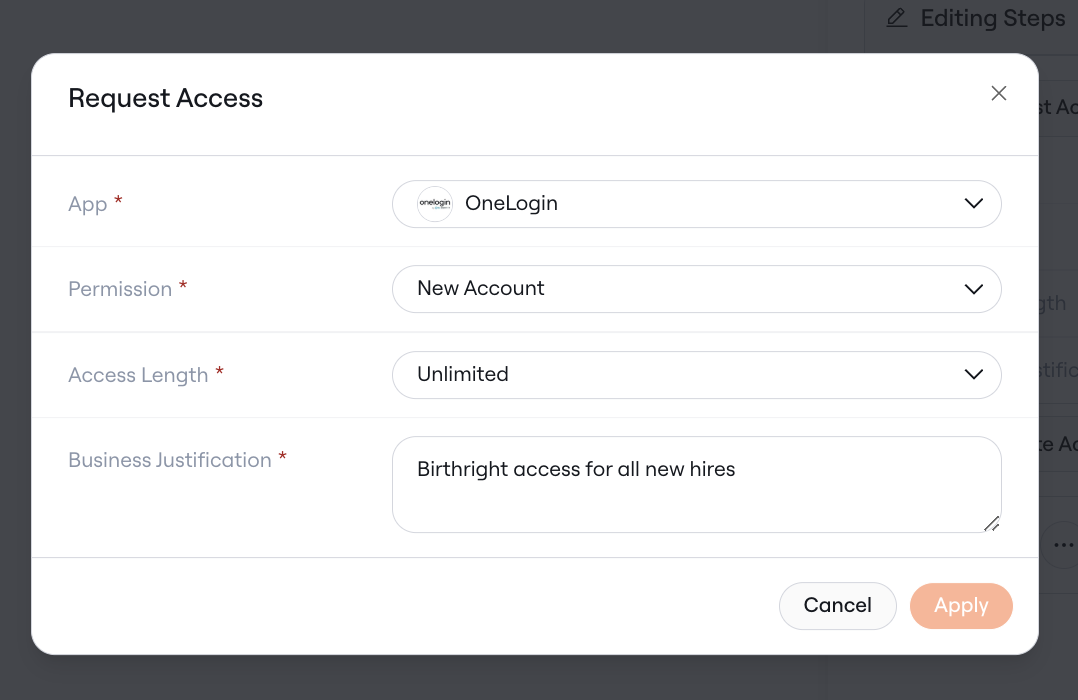
- App: Select the specific app to request
- Permission: If the app supports more granular access, choose which permission to provision for the employee
- Access Length: If the app supports time-based access, choose which access length you want to request
- Business Justification: Enter a default business justification, which will be used to track why access was granted
Wait Step
This step adds a delay before proceeding to the next step. This is useful when you need to ensure that an account is fully provisioned before granting additional access.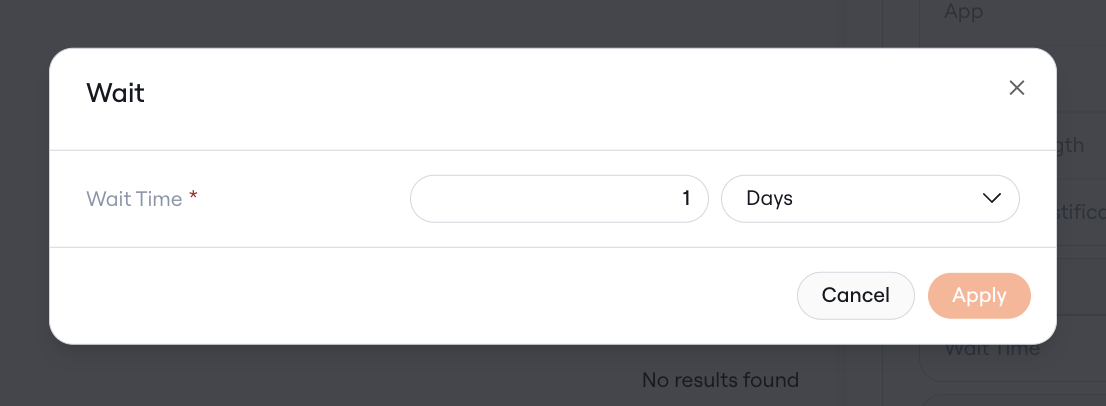
- Wait Duration: Specify how long to wait before continuing to the next step
- Duration Unit: Select minutes, hours, or days
Execute Access Policies
This step evaluates rules that you’ve configured (e.g., if title=“Product Manager”, then you get access to Loom), and automatically kicks off requests for other software access based on the rules.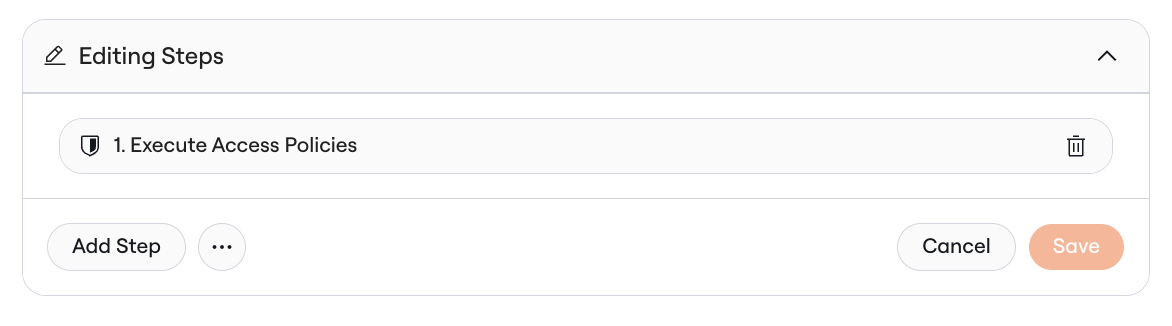
Generate Email
This step allows you to configure a set of rules for how to generate an email address. By default, Lumos ensures that all created email addresses are unique, and if the generated email address is not unique, you can use fallback rules to design the right behavior.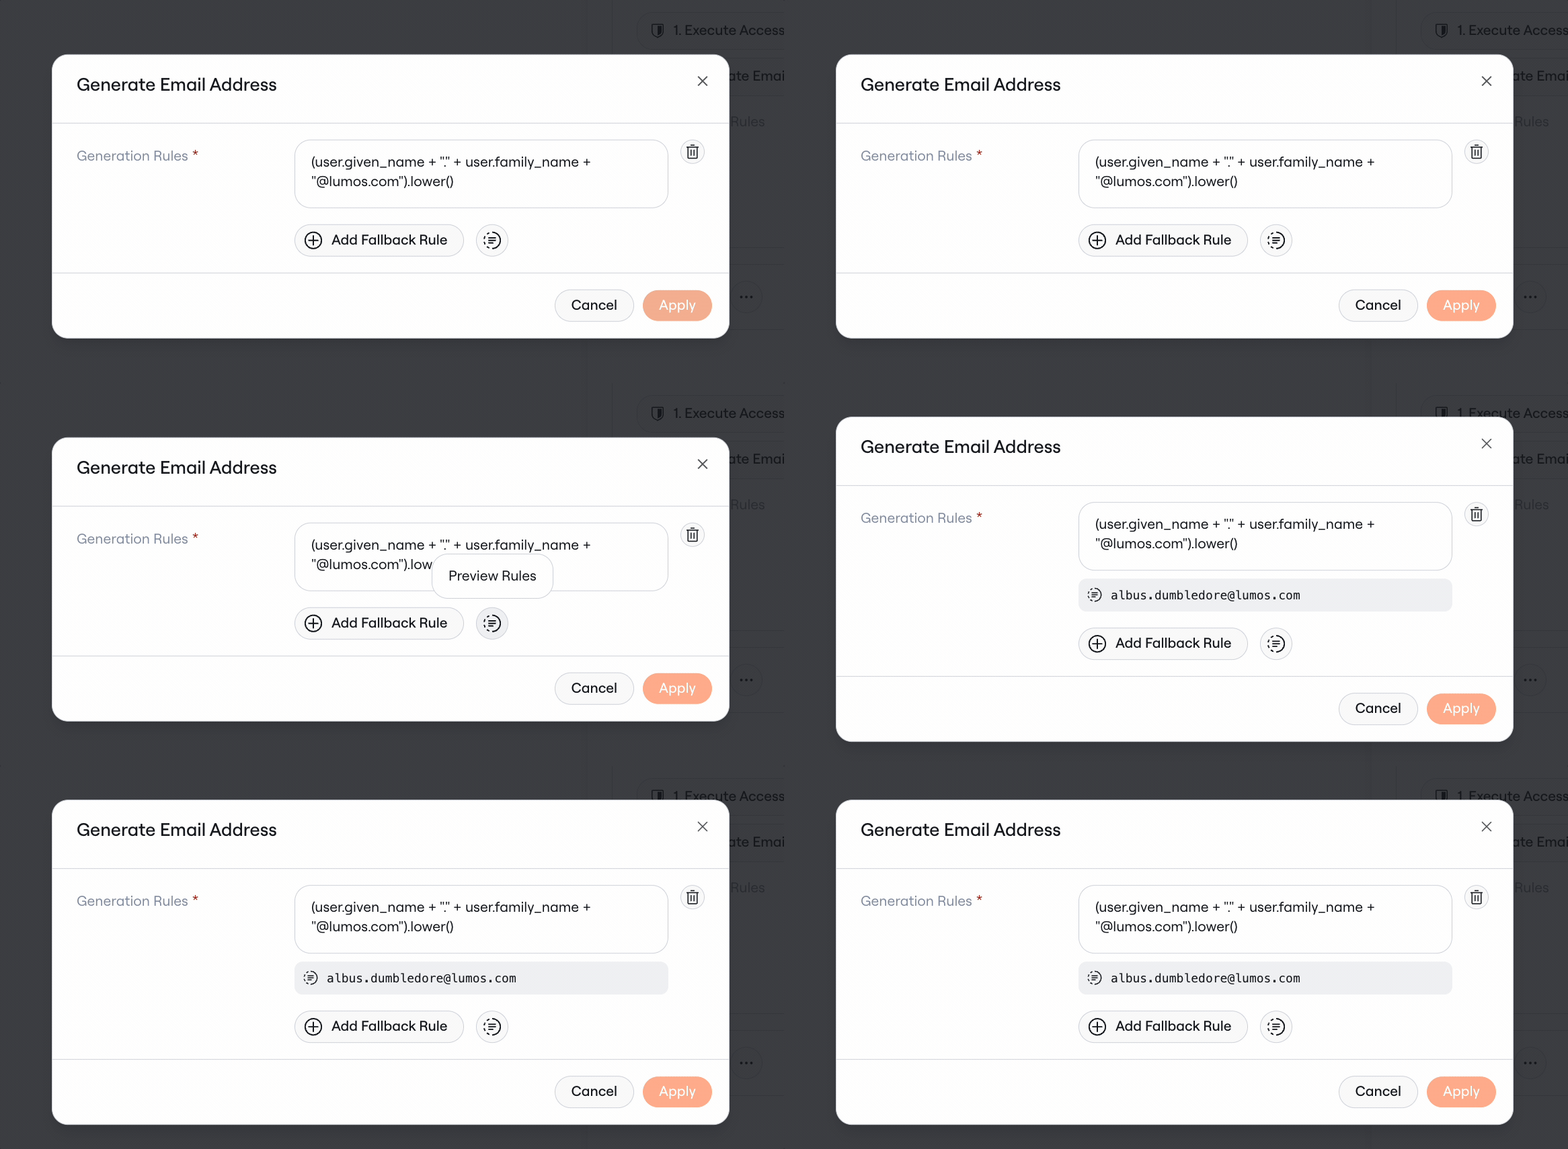
- Generation Rules: Rules configured using the Lumos Expression Language to generate an email address based on identity attributes. If the first rule results in an invalid or non-unique email, Lumos will “fallback” to subsequently defined rules
Viewing Workflow Progress
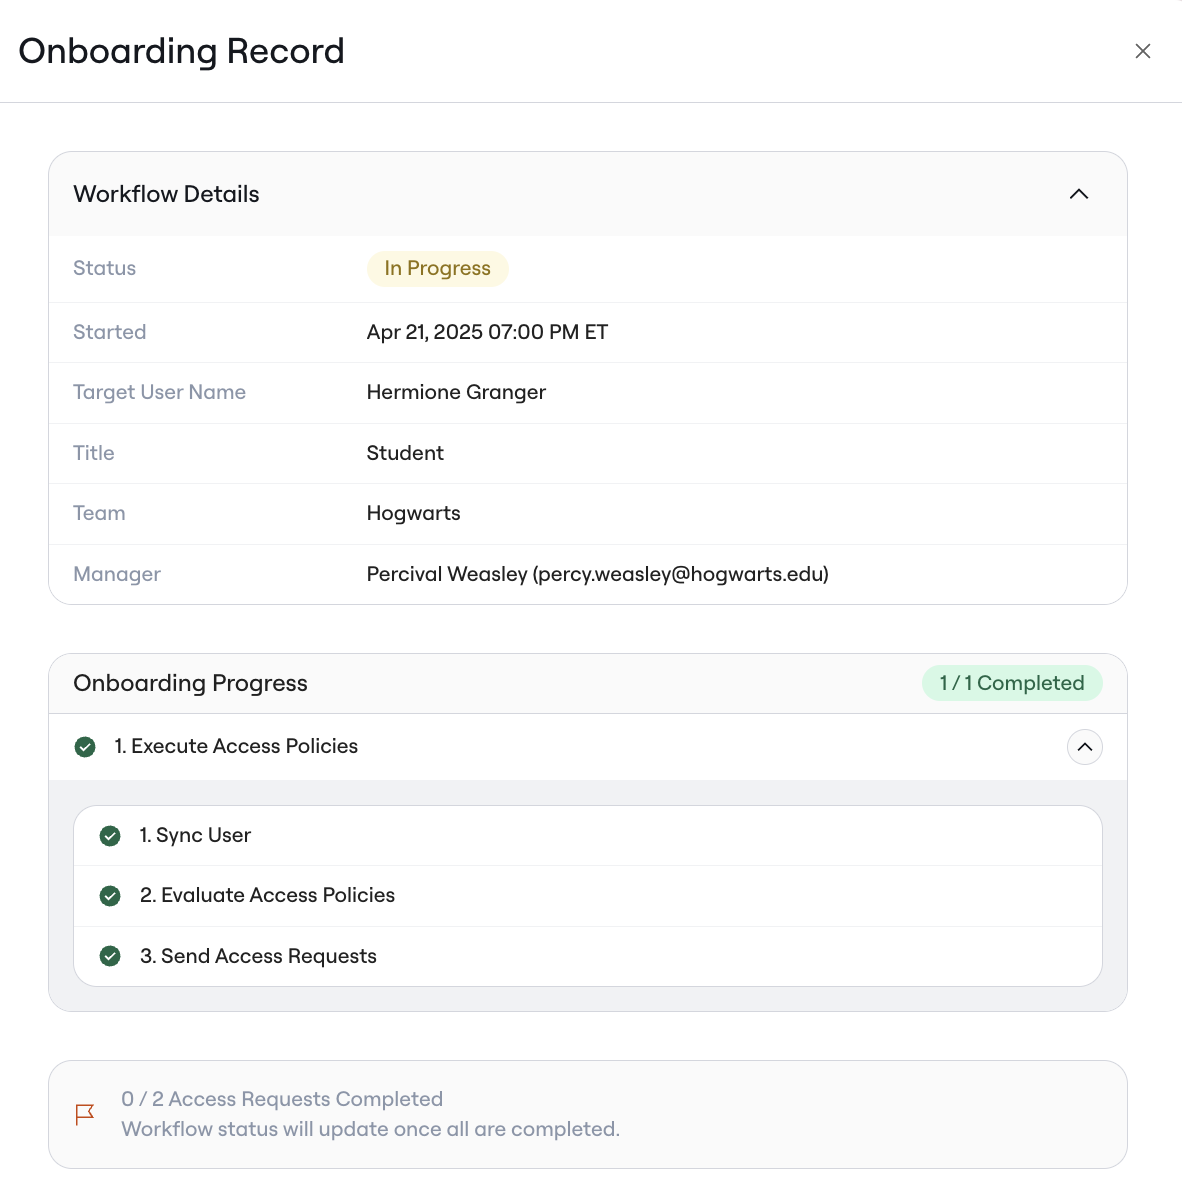
Onboarding Records allow you to monitor the progress of your onboarding workflows to ensure they’re running as expected. In order to view an Onboarding Record, navigate to Employee Lifecycle > Onboarding, and select the onboarding that you would like to view.