

How it works
Lumos looks for a case-sensitive SAML attribute namedroles during login. This attribute should contain a comma-delimited string of Lumos roles to assign to the user. If present, Lumos will overwrite the user’s existing roles with the ones specified in the assertion.
If the roles attribute is not included in the assertion, the user’s current roles will be preserved.
Supported role values
Theroles attribute must include USER, which is required for account access. Additional supported values are:
ORGANIZATION_ADMINREAD_ONLY_ORGANIZATION_ADMINAUDITORAPP_STORE_READ_ONLY_ADMINAPP_ADMINVENDOR_OWNERVENDOR_AGREEMENT_OWNER
Example
Important notes
- Login-time role overwriting: If the
rolesattribute is included in the assertion, it will replace all existing roles for that user in Lumos on every login. - Omitting
rolesis valid: If therolesattribute is absent, Lumos will make no changes to the user’s existing roles. - Manual roles can be overridden: If you assign roles manually in Lumos but also send roles via SAML, the SAML value will always take precedence.
How to configure roles in Okta
To dynamically build a roles attribute that is evaluated at every login, configure it directly in your SAML application’s Attribute Statements using Okta Expression Language.Example Expression
USER, and then append additional roles depending on the user’s group membership. Note that you must use the Okta Group IDs, rather than display names.
Where to Configure
- In the Okta Admin Console, open your SAML application.
- Under the General tab, click on SAML Settings > Edit
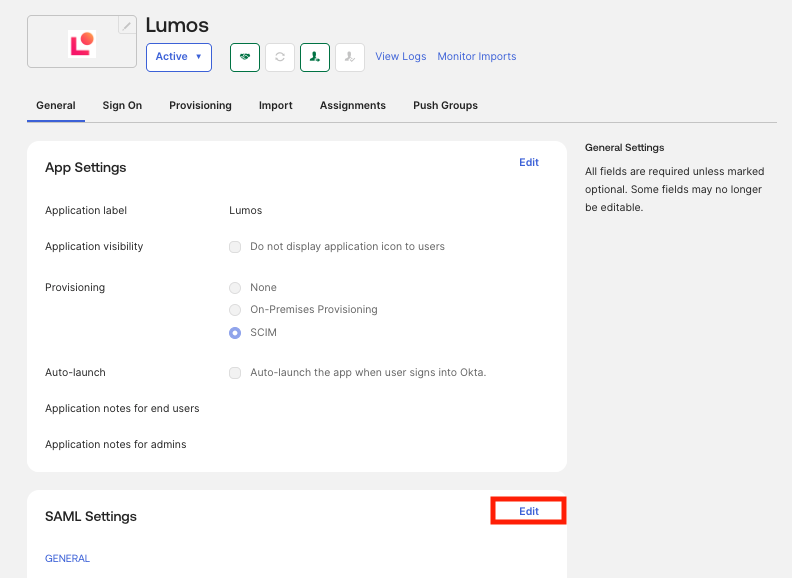
- Click Edit and go through the SAML settings wizard.
-
In the Attribute Statements (Optional) section, add a new attribute
rolesand paste your organization’s version of the expression above as the value.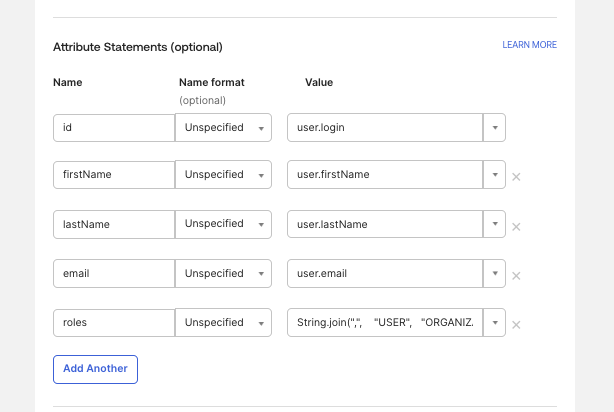
-
Use the Preview SAML Assertion feature to verify the
rolesattribute is populating as expected

- Save your changes.
Testing and troubleshooting
-
Use the SAML tracer in your browser or the SAML Test Connector in Okta to confirm the
rolesattribute is present and correctly formatted. -
Ensure your role string:
- is comma-delimited
- includes
USER - avoids trailing commas or spaces