> ## Documentation Index
> Fetch the complete documentation index at: https://docs.lumos.com/llms.txt
> Use this file to discover all available pages before exploring further.
# Adding a Custom App
## After this article...
You'll be able to add a custom app to Lumos. You can use custom apps to track users for applications that aren't integrated with Lumos, or as a resource people can request in the AppStore.
If you want to add or update custom data on an app that's already in Lumos, start here instead: [Adding Custom Data to Your Apps](/kb/identities/custom-apps/adding-custom-data-to-your-apps)
## Background
Lumos discovers most of the apps your organization uses, but it can't detect some apps, such as internal applications that don't sit behind your Identity Provider. To make these apps requestable in the AppStore or include them in an Access Review, add them as custom apps in Lumos.
## Steps
### 1. Go to the [All Apps page](https://app.lumosidentity.com/apps?tab=apps).
### 2. Click "Add App".
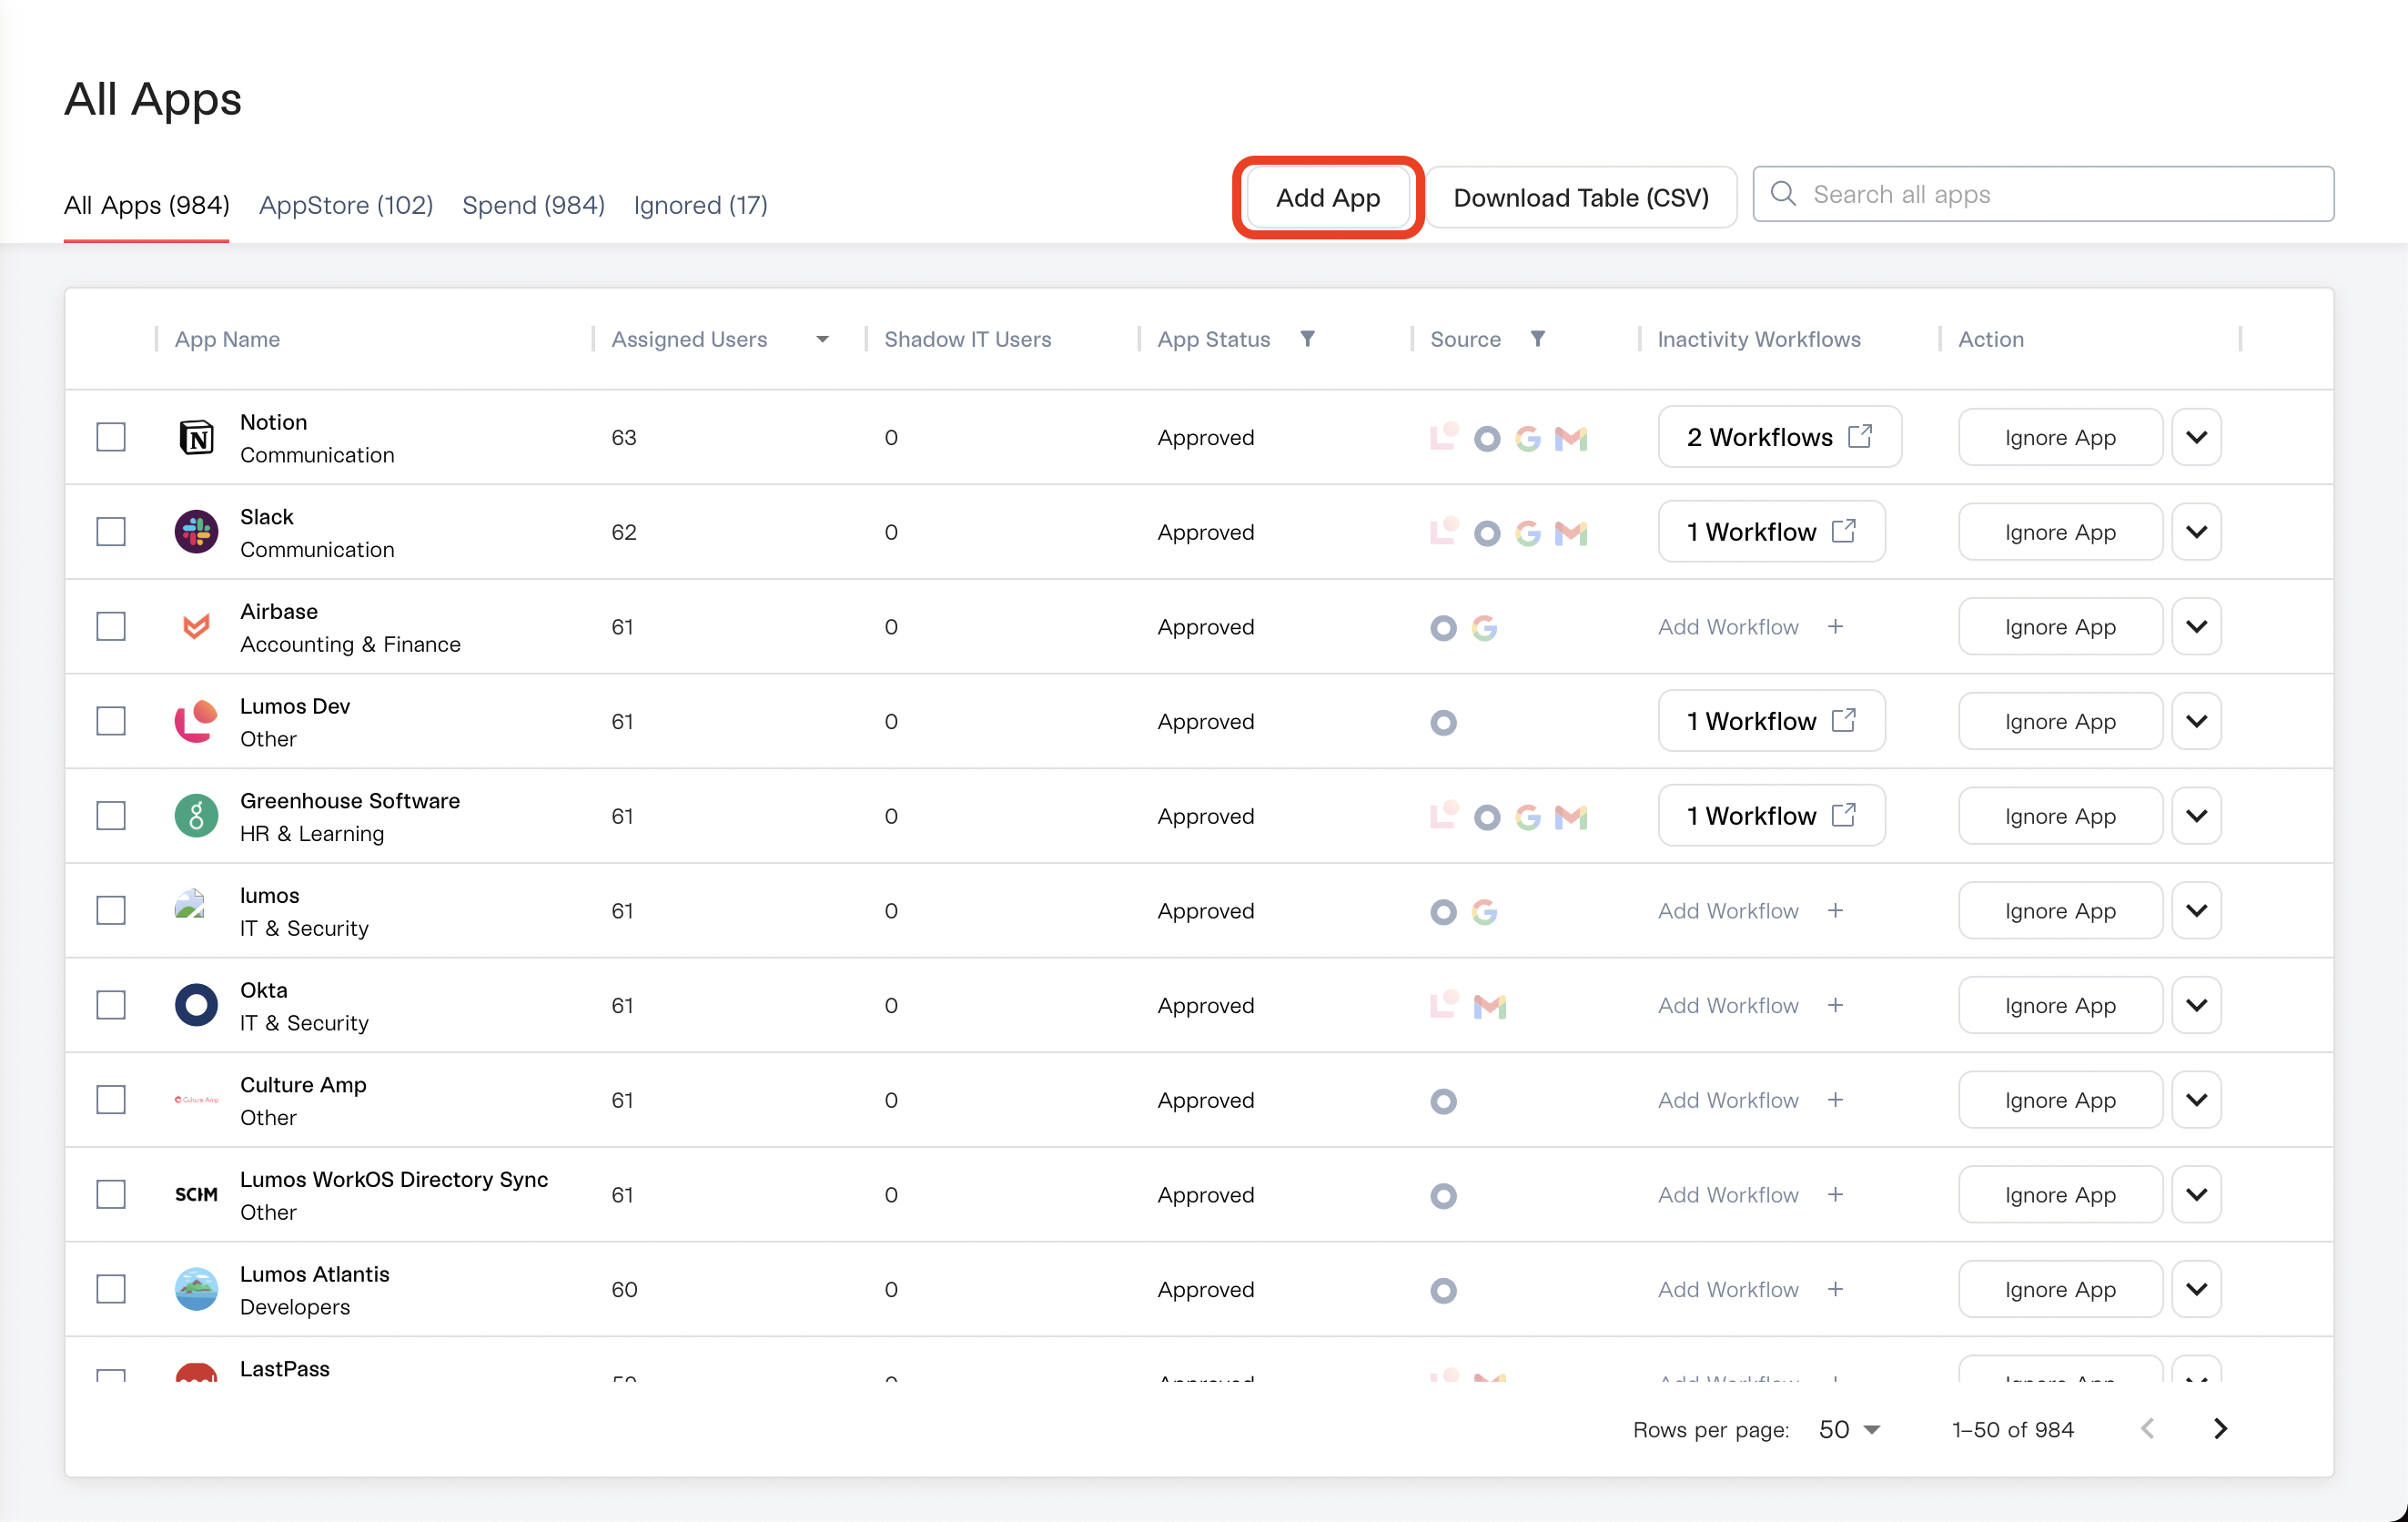 ### 3. Add details for your custom app
Add a name, logo, description, and even define a category for your application.
Click **Continue**, then **View App** to view your new app.
## \[Optional] Upload a CSV of user data
To upload user data to the app, click the **Import Accounts** button to begin the process.
### 3. Add details for your custom app
Add a name, logo, description, and even define a category for your application.
Click **Continue**, then **View App** to view your new app.
## \[Optional] Upload a CSV of user data
To upload user data to the app, click the **Import Accounts** button to begin the process.
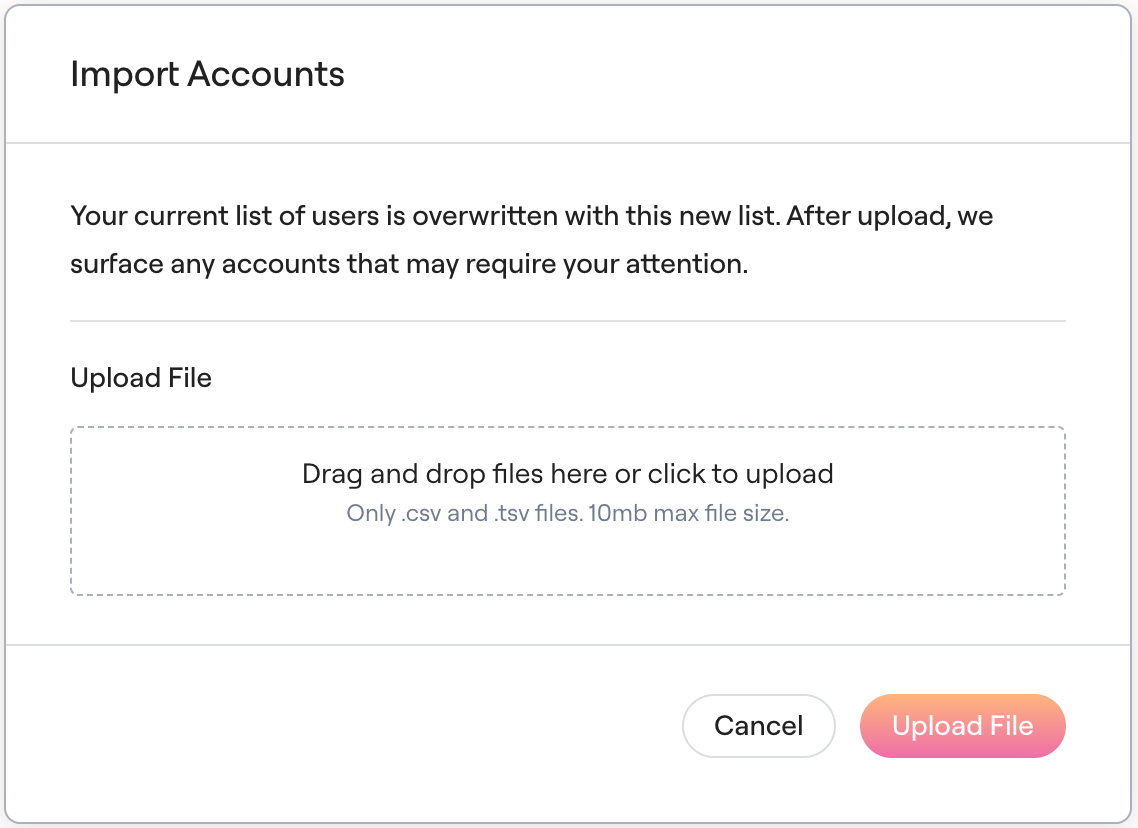
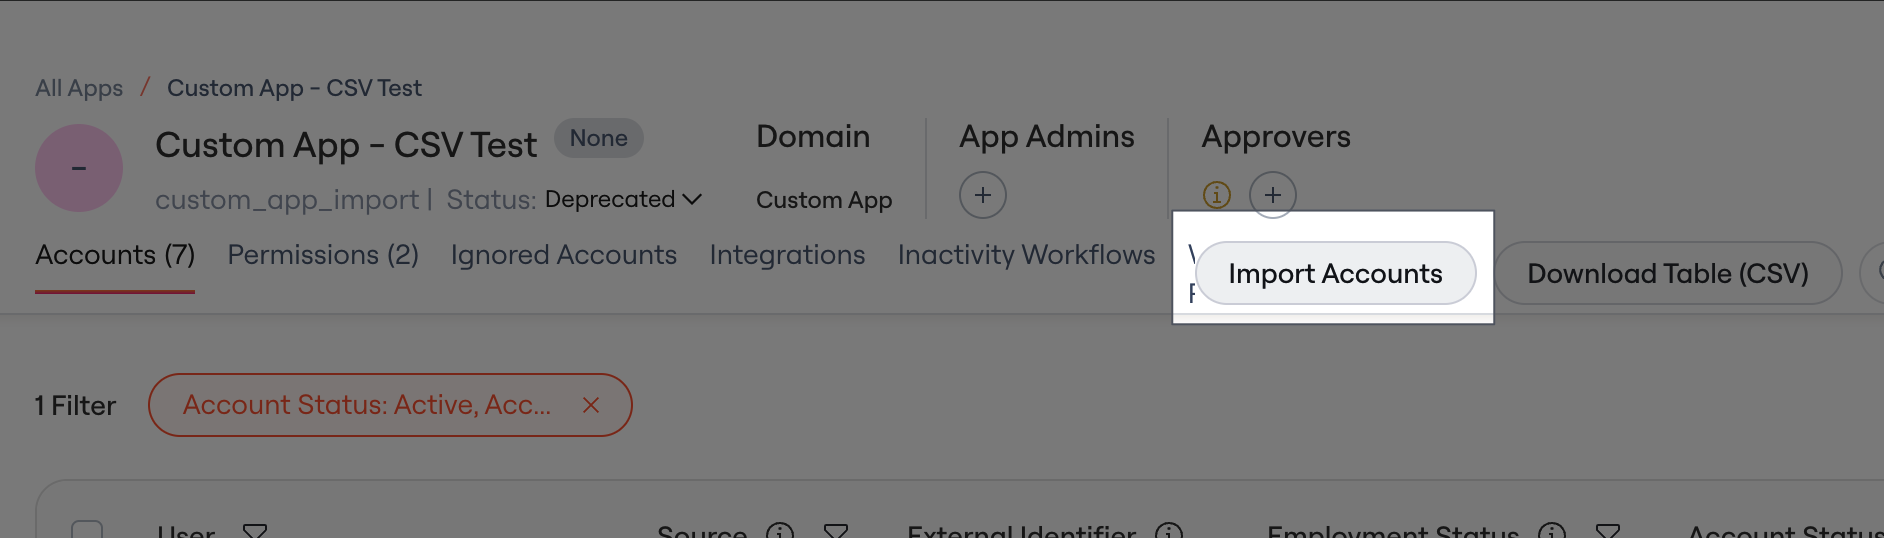 Data must be uploaded as a **CSV** or **TSV** file.
### 1. Upload the CSV file
More information on validations for the file can be found here:[Custom Data (CSV) Formatting Requirements](/kb/identities/custom-apps/custom-data-csv-formatting-requirements)
Data must be uploaded as a **CSV** or **TSV** file.
### 1. Upload the CSV file
More information on validations for the file can be found here:[Custom Data (CSV) Formatting Requirements](/kb/identities/custom-apps/custom-data-csv-formatting-requirements)
 ### 2. Match your CSV columns
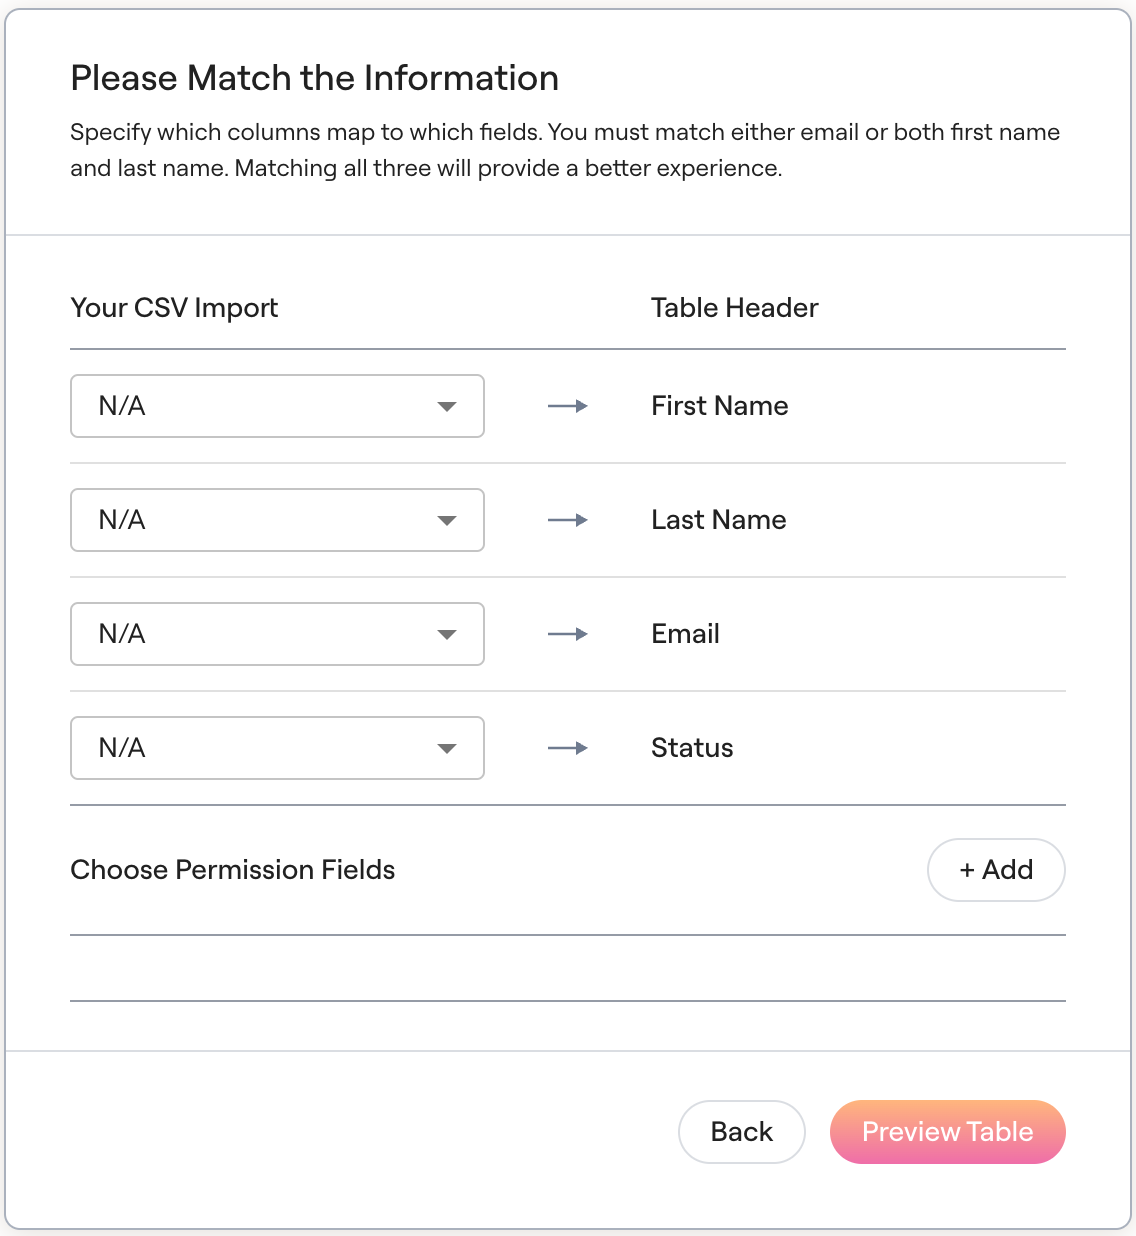 Lumos requires one or both of the following combinations before you can continue:
* First Name **and**Last Name
* Email
You can add any other columns you want by clicking **+Add**, mapping the field to a column in your CSV, then giving the field a name in Lumos.
Lumos requires one or both of the following combinations before you can continue:
* First Name **and**Last Name
* Email
You can add any other columns you want by clicking **+Add**, mapping the field to a column in your CSV, then giving the field a name in Lumos.
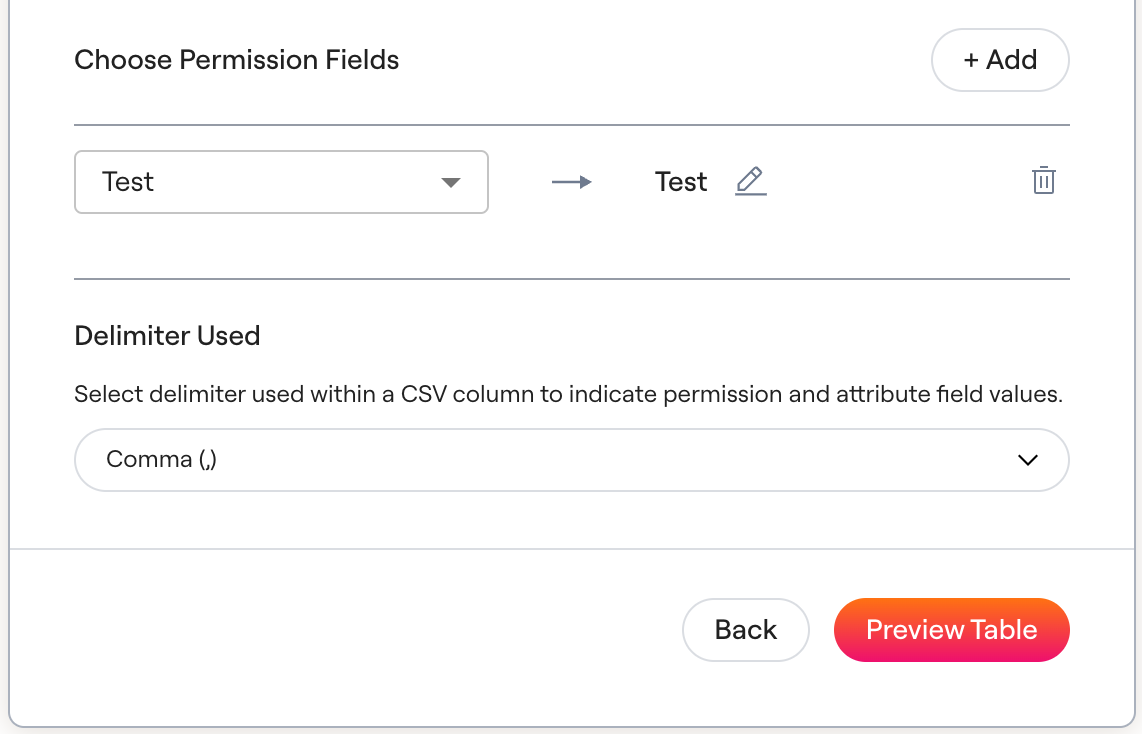 The **Delimiter Used** section at the bottom lets you tell Lumos which character separates multiple values in one cell. For instance, if an account has several roles, put them all in one cell, separated by the delimiter you select.
### 3. Check your work and import the app
Click **Preview Table** to see a preview of your CSV data before you confirm the upload.
The **Delimiter Used** section at the bottom lets you tell Lumos which character separates multiple values in one cell. For instance, if an account has several roles, put them all in one cell, separated by the delimiter you select.
### 3. Check your work and import the app
Click **Preview Table** to see a preview of your CSV data before you confirm the upload.
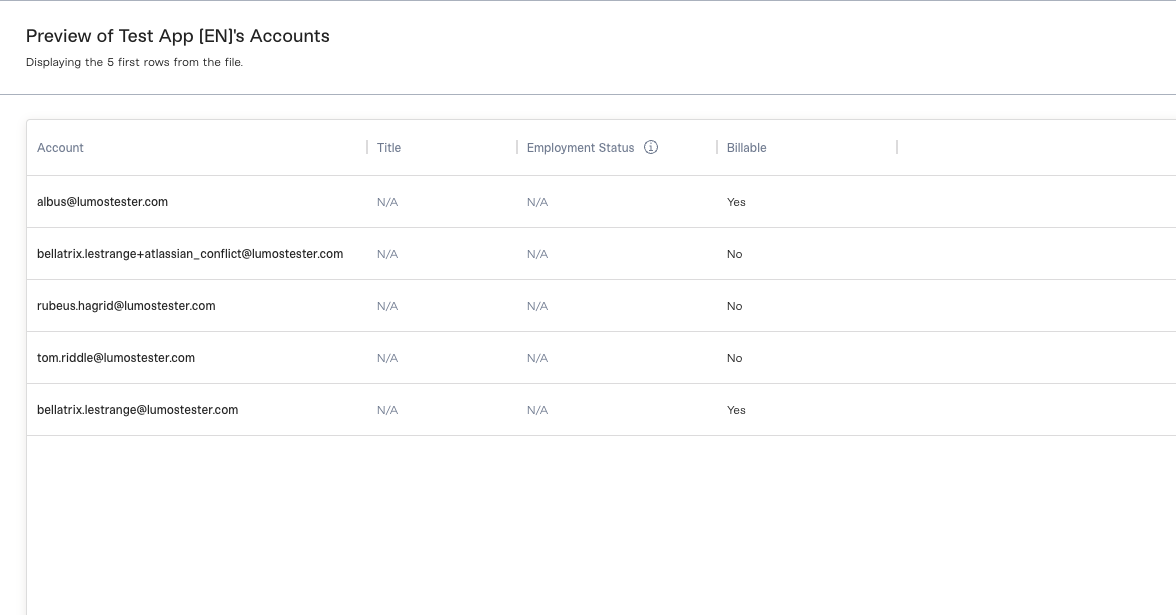 If the preview is correct, click **Finish Import**.
Accounts may take up to 15 minutes to appear after the import finishes.
You'll be able to see the app on the [Apps page](https://app.lumosidentity.com/apps?tab=apps), with a special icon to indicate that it has manually imported data.
If the preview is correct, click **Finish Import**.
Accounts may take up to 15 minutes to appear after the import finishes.
You'll be able to see the app on the [Apps page](https://app.lumosidentity.com/apps?tab=apps), with a special icon to indicate that it has manually imported data.
 ## FAQs
**I'm getting the below error. Is there anything I should check ahead of escalating to Lumos Support?**
*"Sorry. We were unable to preview the uploaded CSV. Our team was already notified and is working to fix it."*
## FAQs
**I'm getting the below error. Is there anything I should check ahead of escalating to Lumos Support?**
*"Sorry. We were unable to preview the uploaded CSV. Our team was already notified and is working to fix it."*
 Make sure that, if you include a column mapping to 'Status' in Lumos, it follows the [Account Status requirements](/kb/identities/custom-apps/custom-data-csv-formatting-requirements#account-status).
**My upload failed. What else should I check?**
Check that your file:
* Is in UTF-8 format
* Is 10 MB or smaller
* Includes an Email, or a First Name and Last Name, for every row
* Uses only valid values in the Status column, if you include one
See [Custom Data (CSV) Formatting Requirements](/kb/identities/custom-apps/custom-data-csv-formatting-requirements) for the full list.
If the upload still fails, contact [support@lumos.com](mailto:support@lumos.com) and include a screenshot of the error. To add or update data on this app later, see [Adding Custom Data to Your Apps](/kb/identities/custom-apps/adding-custom-data-to-your-apps).
Make sure that, if you include a column mapping to 'Status' in Lumos, it follows the [Account Status requirements](/kb/identities/custom-apps/custom-data-csv-formatting-requirements#account-status).
**My upload failed. What else should I check?**
Check that your file:
* Is in UTF-8 format
* Is 10 MB or smaller
* Includes an Email, or a First Name and Last Name, for every row
* Uses only valid values in the Status column, if you include one
See [Custom Data (CSV) Formatting Requirements](/kb/identities/custom-apps/custom-data-csv-formatting-requirements) for the full list.
If the upload still fails, contact [support@lumos.com](mailto:support@lumos.com) and include a screenshot of the error. To add or update data on this app later, see [Adding Custom Data to Your Apps](/kb/identities/custom-apps/adding-custom-data-to-your-apps).