> ## Documentation Index
> Fetch the complete documentation index at: https://docs.lumos.com/llms.txt
> Use this file to discover all available pages before exploring further.
# Managing Manual User Sources
## Background
Your company's Lumos User accounts (which your employees use to log in) are managed automatically from your [User Sources](/kb/appstore/source-of-truth/importing-user-sources).
When you integrate your sources of truth and [connect them as User Sources](/kb/appstore/source-of-truth/importing-user-sources#editing-your-user-sources), Lumos User accounts are automatically created and updated through automated syncs.
This article provides a playbook for configuring [custom](/kb/identities/custom-apps/adding-a-custom-app) apps as User Sources so you can create Lumos Users without requiring a direct integration with that app.
## Prerequisites
* A [properly-formatted](/kb/identities/custom-apps/custom-data-csv-formatting-requirements) CSV with the users you want to add to Lumos. Lumos ***strongly*** recommends adding columns for each employee's first name, last name, email, and [status](/kb/identities/custom-apps/custom-data-csv-formatting-requirements). Optionally, you can add more columns to map attributes like Department, Job Title, etc.
* A [custom app](/kb/identities/custom-apps/adding-a-custom-app) that will hold the accounts you want to create in Lumos.
* Lumos Users created via the CSV import will need to have active accounts in your [login provider](/kb/appstore/source-of-truth/source-of-truth#login-providers) **and** an email domain managed by your company to access Lumos.
## Steps
### 1. [Create a custom app](/kb/identities/custom-apps/adding-a-custom-app).
### 2. Set that app as a [User Source](/kb/appstore/source-of-truth/importing-user-sources#editing-your-user-sources).
### 3. [Import the user data](/kb/identities/custom-apps/adding-a-custom-app#optional-upload-a-csv-of-user-data) into your custom app.
If you've already imported users into your app, any new file you upload must include the existing users or they'll be marked as **Deprovisioned** in Lumos.
If this isn't the first time you're importing user data for this app, Lumos **strongly** recommends *downloading* the user accounts from the app in Lumos (using the `Download Table (CSV)` button in the screenshot below), adding the new accounts, and re-uploading the entire list of users.
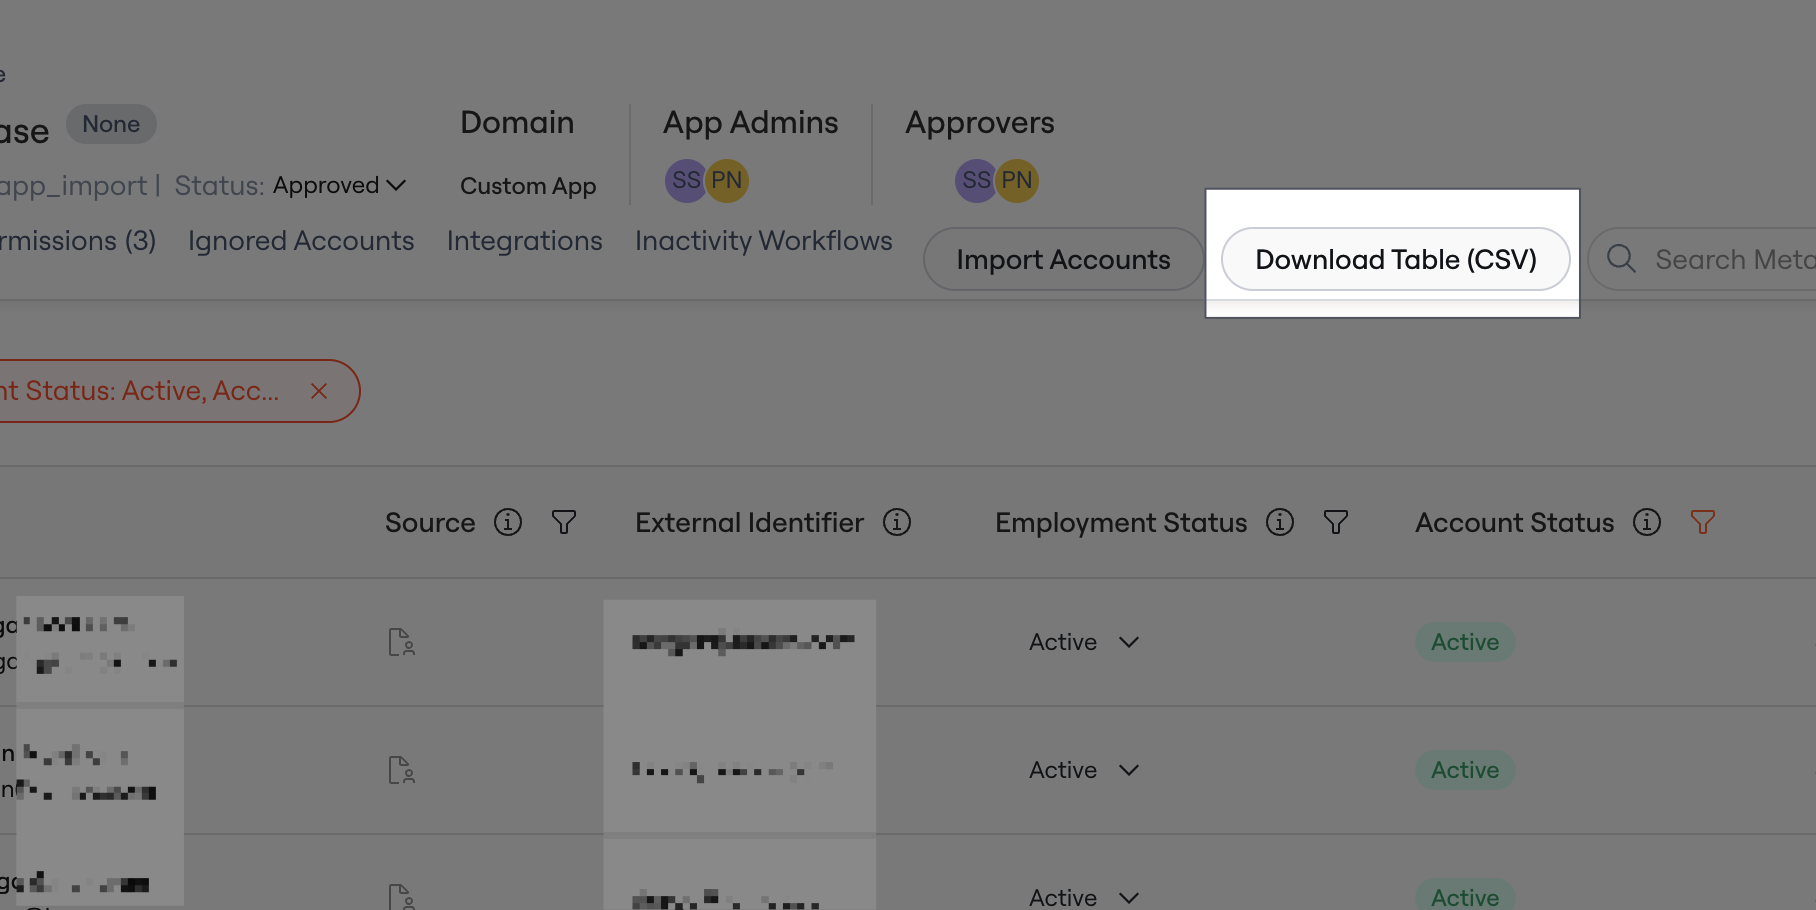 Downloading users from your custom app for your next upload
Lumos **strongly** recommends adding a [Status column](/kb/identities/custom-apps/custom-data-csv-formatting-requirements) to any CSV you upload to indicate whether the user is still at your company. If you're not sure what values to use for the status, default to the values `ACTIVE` and `SUSPENDED`.
A sample file is provided below, for reference.
### 4. Wait for the sync to finish.
Once the sync finishes (usually it takes less than a minute), you should see new [Lumos Members](https://app.lumosidentity.com/identities?tab=Lumos+Members) imported from the custom app and can configure their `Access Level` accordingly.
## Limitations
* Users created via CSV import will remain active in Lumos until you manually change their `Access Level` to `No Access` on the [Lumos Members](https://app.lumosidentity.com/identities?tab=Lumos+Members) page.
* If you're mapping a custom attribute for the first time, you may need to upload your CSV twice -- once so that Lumos can detect the new attributes, and again for Lumos to ingest them.
Downloading users from your custom app for your next upload
Lumos **strongly** recommends adding a [Status column](/kb/identities/custom-apps/custom-data-csv-formatting-requirements) to any CSV you upload to indicate whether the user is still at your company. If you're not sure what values to use for the status, default to the values `ACTIVE` and `SUSPENDED`.
A sample file is provided below, for reference.
### 4. Wait for the sync to finish.
Once the sync finishes (usually it takes less than a minute), you should see new [Lumos Members](https://app.lumosidentity.com/identities?tab=Lumos+Members) imported from the custom app and can configure their `Access Level` accordingly.
## Limitations
* Users created via CSV import will remain active in Lumos until you manually change their `Access Level` to `No Access` on the [Lumos Members](https://app.lumosidentity.com/identities?tab=Lumos+Members) page.
* If you're mapping a custom attribute for the first time, you may need to upload your CSV twice -- once so that Lumos can detect the new attributes, and again for Lumos to ingest them.