> ## Documentation Index
> Fetch the complete documentation index at: https://docs.lumos.com/llms.txt
> Use this file to discover all available pages before exploring further.
# MCP
This guide explains how to connect an MCP-compatible AI client to Lumos MCP and verify that the user can discover and run Lumos tools.
# Connect to the Lumos User MCP Server
The Lumos user MCP server connects your AI client to the Lumos AppStore using the Model Context Protocol (MCP), the open standard for letting AI tools call external services. Search the app catalog, request access, and check your request status without leaving the tool you already use.
This guide shows you how to connect a client, log in, and run your first request.
**Looking for the Admin MCP server?**
If you are trying to configure and manage Lumos, try the [Lumos Admin MCP Server](/docs/lumos-admin-mcp).
If you are trying to govern which MCP servers and tools your employees' agents can call, see [MCP Governance: Deployment](/docs/mcp-governance-rollout).
## Before you begin
You need:
* A Lumos account you can log in to through your organization's login method.
* An MCP-compatible client that supports remote (HTTP) MCP servers and browser-based OAuth. Supported clients include Claude Code, Claude, Codex, Gemini CLI, and OpenCode.
* Network access to the Lumos MCP endpoint.
The user server endpoint is:
```text theme={null}
https://api.lumos.com/mcp/user
```
## How it works
You connect over OAuth in your browser, so you never paste an API key or token into the client. Your client opens a Lumos login page in your browser. You log in and approve a consent screen that shows what the client can do. Lumos then gives the client a token scoped to only the tools you're allowed to use.
You authorize each client the first time it connects. Lumos remembers your approval, so you won't log in or approve again unless your access is revoked or the client requests new permissions.
## Connect your client
Pick your client below. Every client uses the same endpoint: `https://api.lumos.com/mcp/user`.
Add the server with HTTP transport:
```text theme={null}
claude mcp add --transport http lumos https://api.lumos.com/mcp/user
```
Or add it as JSON:
```text theme={null}
{
"mcpServers": {
"lumos": {
"type": "http",
"url": "https://api.lumos.com/mcp/user"
}
}
}
```
Add Lumos as a custom connector using the remote MCP URL.
1. Follow the [Claude custom connectors guide](https://support.claude.com/en/articles/11175166-get-started-with-custom-connectors-using-remote-mcp) .
2. When prompted for a URL, enter:
```text theme={null}
https://api.lumos.com/mcp/user
```
3. Complete the OAuth login when prompted.
Add the server to `~/.codex/config.toml` (or your Codex CLI config file):
```text theme={null}
[mcp_servers.lumos]
url = "https://api.lumos.com/mcp/user"
```
Then log in:
```text theme={null}
codex mcp login lumos
```
This opens your browser to finish logging in. Codex saves your credentials until the token expires.
Run in your terminal:
```text theme={null}
gemini mcp add --transport http lumos https://api.lumos.com/mcp/user
```
Or add it to \~/.gemini/settings.json:
```text theme={null}
{
"mcpServers": {
"lumos": {
"httpUrl": "https://api.lumos.com/mcp/user"
}
}
}
```
Add this to your `opencode.json` file:
```text theme={null}
{
"mcp": {
"lumos": {
"type": "remote",
"url": "https://api.lumos.com/mcp/user",
"enabled": true
}
}
}
```
Most other clients use remote (HTTP) authentication. Add the server to your client's config file with the HTTP transport and the user endpoint:
```text theme={null}
{
"mcpServers": {
"lumos": {
"type": "http",
"url": "https://api.lumos.com/mcp/user"
}
}
}
```
Then complete the OAuth login flow when prompted.
## Authenticate and approve access
When your client connects, Lumos opens a browser-based OAuth flow.
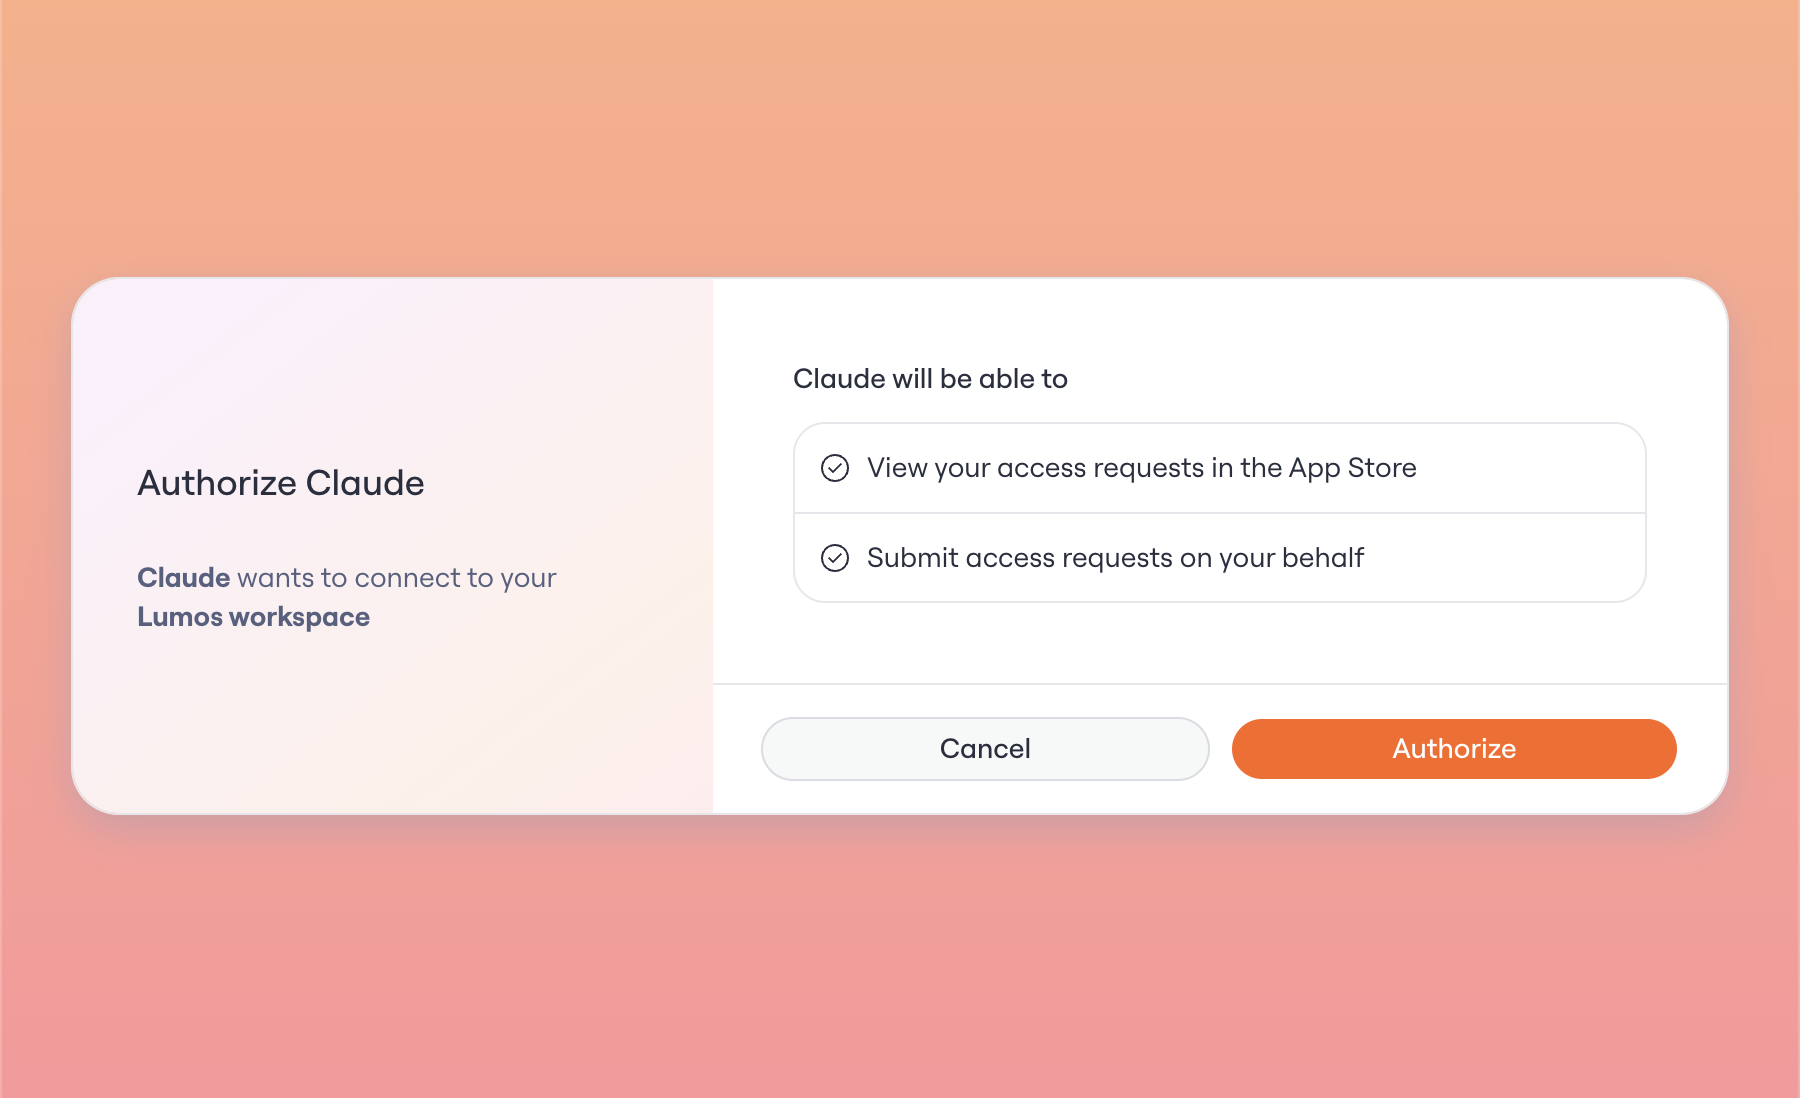 On the consent screen, Lumos:
* Confirms you're logged in, or asks you to log in.
* Shows which client is requesting access (for example, Claude).
* Lists the permissions it's requesting.
* Lets you approve or deny the connection.
Review the permissions and select **Authorize** to connect.
For the user server, the requested scopes are:
| Scope | What you'll see on the consent screen |
| - | - |
| `lumos:user:read` | View your access requests in the App Store. |
| `lumos:user:write` | Submit access requests on your behalf. |
Lumos remembers your approval for the same user, client, and scopes. You'll approve again only if the client requests new scopes, your access is revoked, or the client asks for a fresh consent prompt.
## Verify your tools
After you log in, check that the Lumos tools appear in your client. Most clients list them in a Tools or MCP panel. Command-line clients may show them with a status or diagnostic command.
| Tool | Purpose |
| - | - |
| `search_apps` | Search the Lumos app catalog. |
| `search_requestable_permissions` | Search permission labels across every app you can request. |
| `list_requestable_permissions` | List the permissions you can request for a specific app. |
| `submit_access_request` | Submit a request for access to an app or its permissions. |
| `list_access_requests` | List your own recent access requests. |
The exact tools you see depend on your Lumos permissions and your organization's feature flags.
## Run your first request
Once the tools are connected, tell your agent what you need in plain language. It searches the AppStore, finds matching apps and permissions, and guides you through the request.
```text theme={null}
I need access to an app that lets me view sales reports so I can prepare for the upcoming all-hands.
```
## Troubleshooting
### The client can't discover the server
Check that the MCP URL is correct and includes the `/mcp/user` path. Your client must connect to the MCP endpoint, not the Lumos web app URL.
### The browser login flow doesn't open
Confirm your client supports remote MCP authentication. Older clients may need an update to complete browser-based OAuth.
### You're connected but don't see the expected tools
The tools you see depend on your Lumos role, your product access, and your organization's feature flags. If a tool you expect is missing, check these with your Lumos admin.
### A write action is denied
You may have approved the `lumos:user:write` scope, but your Lumos role may not grant the permission the tool needs. For example, you might be able to view AppStore items but not submit access requests.
### You're asked to log in again
Access tokens are short-lived. If your refresh token expires or is revoked, log in again to reconnect.
## Lumos Admin MCP Server
A separate Lumos admin MCP server is coming, with tools to configure and manage Lumos. Admin tools require specific scopes based on the toolset you request, and your Lumos role must allow them. Links to the docs will be added here when they're ready.
On the consent screen, Lumos:
* Confirms you're logged in, or asks you to log in.
* Shows which client is requesting access (for example, Claude).
* Lists the permissions it's requesting.
* Lets you approve or deny the connection.
Review the permissions and select **Authorize** to connect.
For the user server, the requested scopes are:
| Scope | What you'll see on the consent screen |
| - | - |
| `lumos:user:read` | View your access requests in the App Store. |
| `lumos:user:write` | Submit access requests on your behalf. |
Lumos remembers your approval for the same user, client, and scopes. You'll approve again only if the client requests new scopes, your access is revoked, or the client asks for a fresh consent prompt.
## Verify your tools
After you log in, check that the Lumos tools appear in your client. Most clients list them in a Tools or MCP panel. Command-line clients may show them with a status or diagnostic command.
| Tool | Purpose |
| - | - |
| `search_apps` | Search the Lumos app catalog. |
| `search_requestable_permissions` | Search permission labels across every app you can request. |
| `list_requestable_permissions` | List the permissions you can request for a specific app. |
| `submit_access_request` | Submit a request for access to an app or its permissions. |
| `list_access_requests` | List your own recent access requests. |
The exact tools you see depend on your Lumos permissions and your organization's feature flags.
## Run your first request
Once the tools are connected, tell your agent what you need in plain language. It searches the AppStore, finds matching apps and permissions, and guides you through the request.
```text theme={null}
I need access to an app that lets me view sales reports so I can prepare for the upcoming all-hands.
```
## Troubleshooting
### The client can't discover the server
Check that the MCP URL is correct and includes the `/mcp/user` path. Your client must connect to the MCP endpoint, not the Lumos web app URL.
### The browser login flow doesn't open
Confirm your client supports remote MCP authentication. Older clients may need an update to complete browser-based OAuth.
### You're connected but don't see the expected tools
The tools you see depend on your Lumos role, your product access, and your organization's feature flags. If a tool you expect is missing, check these with your Lumos admin.
### A write action is denied
You may have approved the `lumos:user:write` scope, but your Lumos role may not grant the permission the tool needs. For example, you might be able to view AppStore items but not submit access requests.
### You're asked to log in again
Access tokens are short-lived. If your refresh token expires or is revoked, log in again to reconnect.
## Lumos Admin MCP Server
A separate Lumos admin MCP server is coming, with tools to configure and manage Lumos. Admin tools require specific scopes based on the toolset you request, and your Lumos role must allow them. Links to the docs will be added here when they're ready.